Hyundai Genesis (DH): Lighting System / Head Lamps Repair procedures
Hyundai Genesis (DH) 2013-2016 Service Manual / Body Electrical System / Lighting System / Head Lamps Repair procedures
| Inspection |
| 1. |
Check the battery voltage. (Low beam will be on when the battery voltage above 9V.) |
| 2. |
Check the fuse and relay. |
| 3. |
Check the ballast power supply terminals (if the terminals are reversed, the low beam does not illuminate.). |
| 4. |
Check the bulb connector securely. |
| 5. |
Visual check of the bulb (no filament) : damaged glass, damaged for upper parts and lower parts of glass tube. |
| 6. |
After (1)~(5), replace the ballast and the ignitor. (ballast assembly).
|

Characteristic
| 1. |
Durable for vibration as there is no filament. |
| 2. |
HID lamp has a longer life life than halogen lamp. |
| 3. |
Does not operate if polarity is changed. |
| 4. |
Operating input voltage : 9-16V |
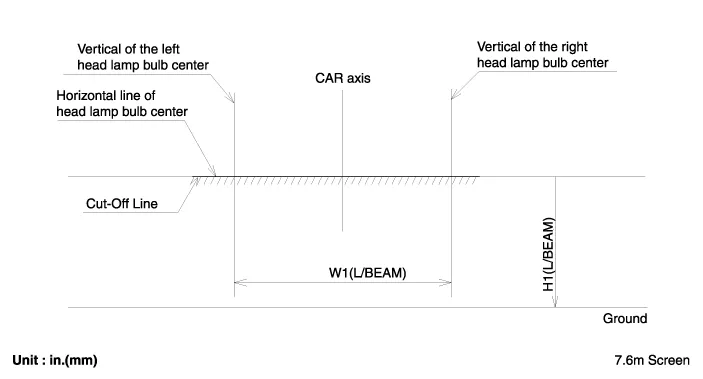
| Head Lamp Aiming Instructions |
The head lamps should be aimed with the proper beam-setting
equipment, and in accordance with the equipment manufacturer's
instructions.
If there are any regulations pertinent to the aiming of head
lamps in the area where the vehicle is to be used, adjust so as to meet
those requirements. |

Alternately turn the adjusting gear to adjust the head lamp
aiming. If beam-setting equipment is not available, proceed as follows :
| 1. |
Inflate the tires to the specified pressure and remove any
loads from the vehicle except the driver, spare tire, tools, coolant and
fuel. |
| 2. |
The vehicle should be placed on a flat ground. |
| 3. |
Draw vertical lines (Vertical lines passing through
respective head lamp centers) and a horizontal line (Horizontal line
passing through center of head lamps) on the screen. |
| 4. |
With the head lamp and battery in normal condition, aim the
head lamps so the brightest portion falls on the horizontal and vertical
lines.
Make horizontal (High_A), Vertical (Low/High_B) adjustments to the lower beam using the adjusting wheel.
|
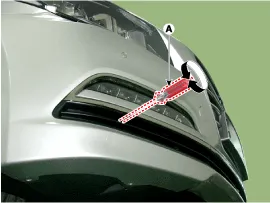
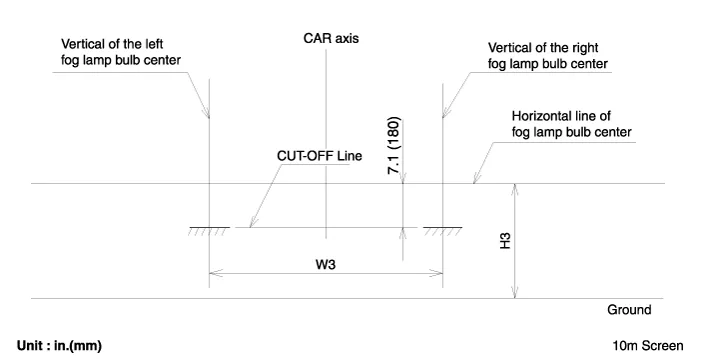
Front Fog Lamp Aiming
The front fog lamps should be aimed as the same manner of the head lamps aiming.
With the front fog lamps and battery normal condition, aim the front fog lamps by turning the adjusting screw (A) with a driver.
Head Lamp And Fog Lamp Aiming Point

| (Halogen type) |

| (BI-Function type) |

| (HID type) |

| 1. |
Head Lamp (Low beam)
|
| 2. |
With the front fog lamp turned on, adjust the cut-off line to be located as shown in the picture below.
|
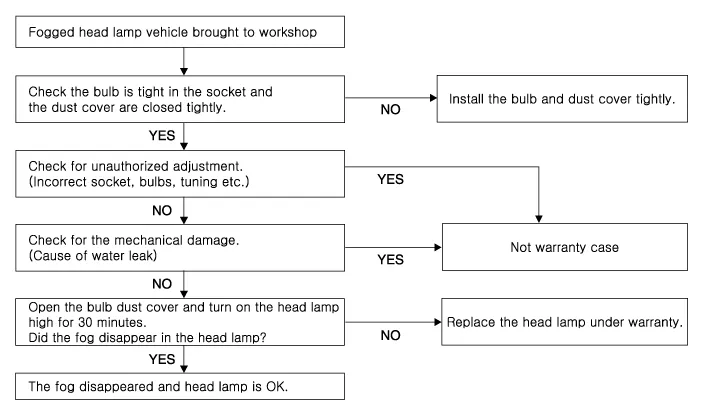
Head lamp fogging
The vehicle with the fogged head lamp is brought to workshop.
| Removal |
| 1. |
Disconnect the negative (-) battery terminal. |
| 2. |
Remove the front bumper cover.
(Refer to Body - "Front Bumper Cover") |
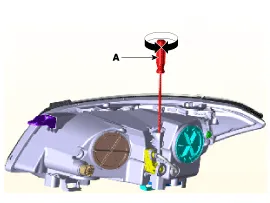
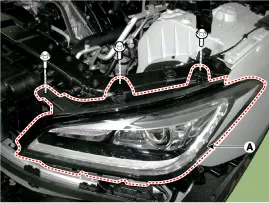
| 3. |
Loosen the head lamp (A) mounting bolt (3EA).
|
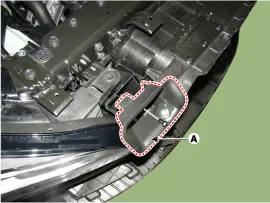
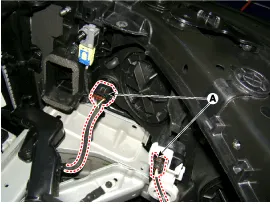
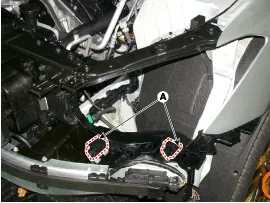
| 4. |
Disconnect the head lamp connector (A) after removing the head lamp assembly.
|
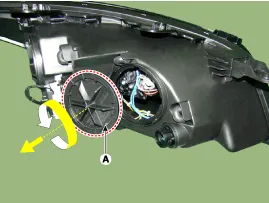
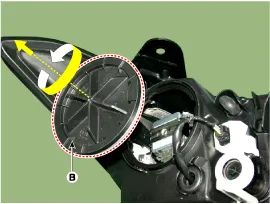
| 5. |
Remove the bulb caps from the head lamp assembly after turning in the counter clock-wise direction.
A : Head Lamp (High) Cap
B : Head Lamp (Low) Cap
|