Hyundai Genesis (DH): Body Dimensions / Front Body Body Repair
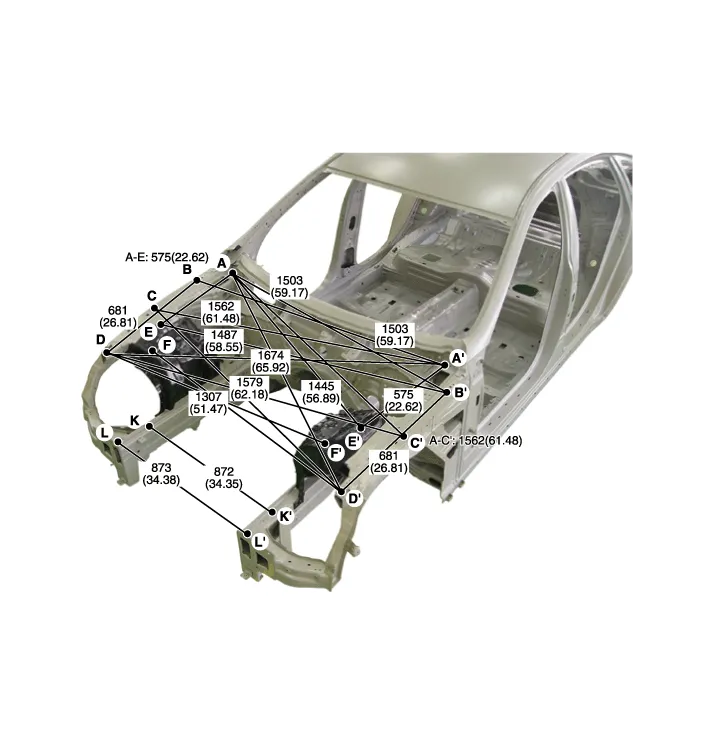
| Front Body A |

| * These dimensions indicated in this figure are actual-measurement dimensions. [ Unit : mm (inch) ] |
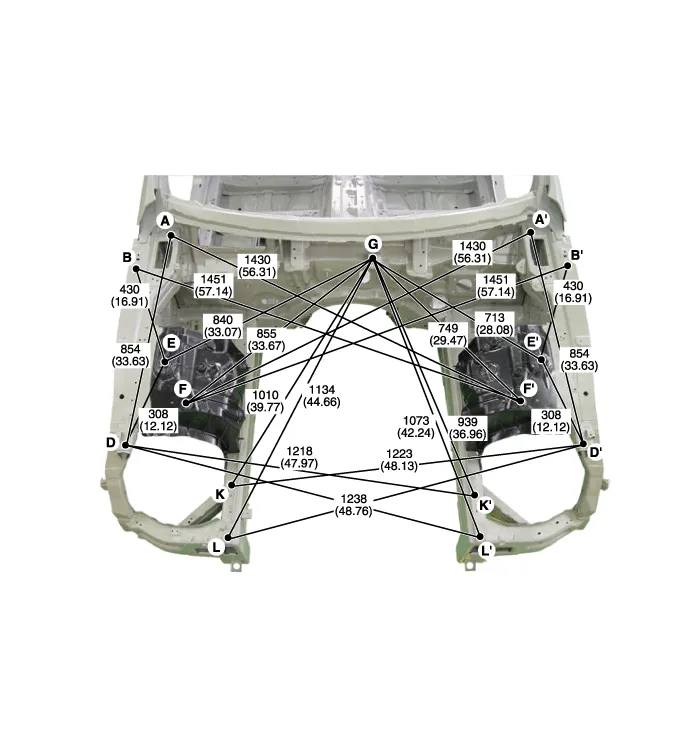
| Front Body B |
| * These dimensions indicated in this figure are actual-measurement dimensions. [ Unit : mm (inch) ] |
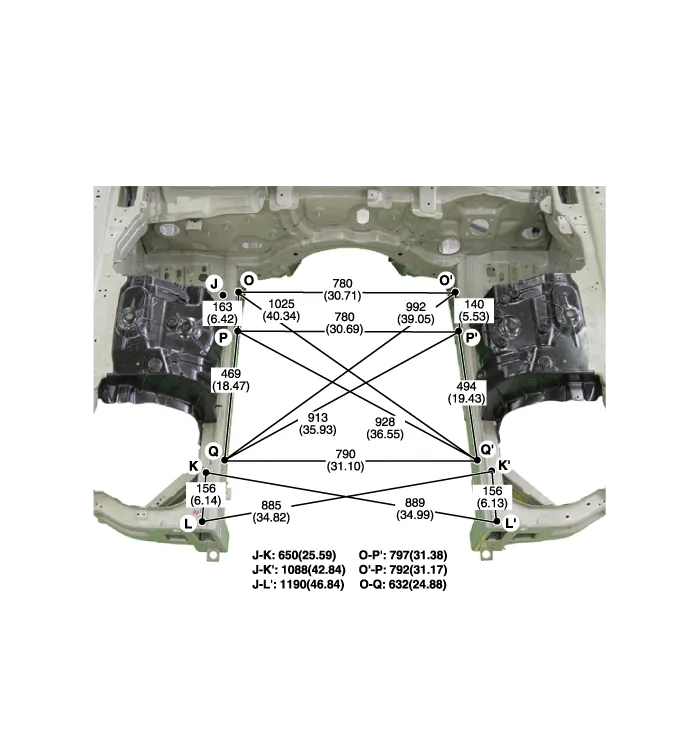
| Front Body C |
| * These dimensions indicated in this figure are actual-measurement dimensions. [ Unit : mm (inch) ] |
| Front Body D |
| * These dimensions indicated in this figure are actual-measurement dimensions. [ Unit : mm (inch) ] |
|
|
|
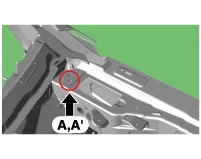
| Hood hinge mounting hole (O11) | Fender panel mounting hole (O6.6) | Fender panel mounting hole (O6.6) |
|
|
|
| Fender panel mounting hole (O6.6) | Front end module mounting hole (O9) | Front end module mounting hole (O9) |
|
|
|
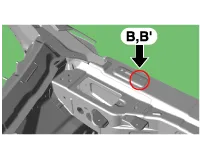
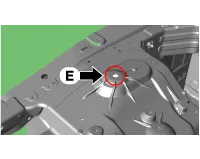
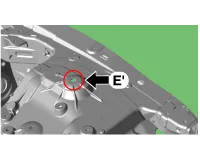
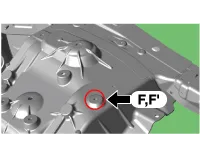
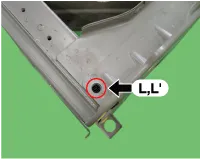
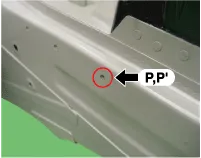
| Front shock absorber housing center panel tooling hole (O15) | Front shock absorber housing center panel tooling hole (O15) | Strut bar mounting hole (O11) |
|
|
|
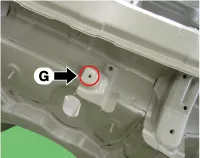
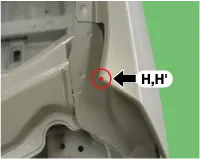
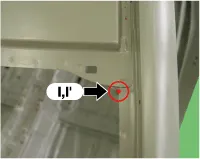
| Wiper pivot center mounting hole (O6.6) | Front pillar outer corner | Front pillar outer corner |

|
|
|
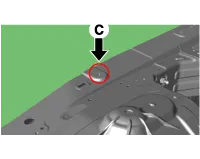
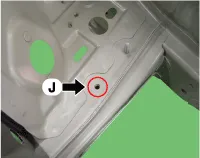
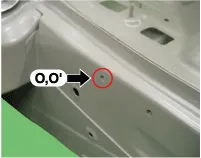
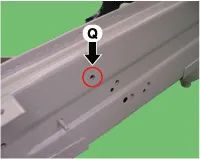
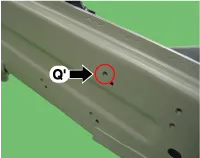
| Front side member tooling hole (O9) | Front side member tooling hole (O6.6) | Fender apron extension tooling hole (O14) |
|
|
|
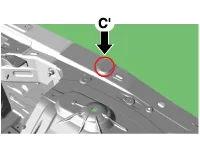
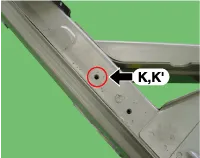
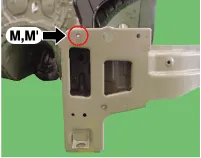
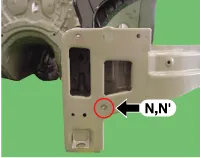
| Front end module mounting hole (O11) | Front end module mounting hole (O15) | Front side member tooling hole (O6.6) |
|
|
|
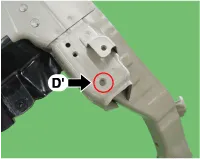
| Front side member tooling hole (O6.6) | Front side member tooling hole (O6.6) | Front side member tooling hole (O6.6) |
General 1. Basically, all measurements in this manual are taken with a tracking gauge. 2. When a measuring tape is used, check to be sure there is no elongation, twisting or bending.
Side Body A * These dimensions indicated in this figure are actual-measurement dimensions. [ Unit : mm (inch) ] Side Body B * These dimensions indicated in this figure are actual-measurement dimensions.
Other information:
Hyundai Genesis (DH) 2013-2016 Service Manual: Compressor Repair procedures
Removal 1. If the compressor is marginally operable, run the engine at idle speed, and let the air conditioning work for a few minutes, then shut the engine off. 2. Disconnect the negative (-) battery terminal. 3. Remove the engine room cover.
Hyundai Genesis (DH) 2013-2016 Service Manual: Auto Defogging Actuator Repair procedures
Inspection 1. Turn the ignition switch OFF. 2. Disconnect the auto defogging connector. 3. Verify that the auto defogging actuator operates to the open position when connecting 12V to terminal 3 and grounding terminal 4. Verify that the auto defogging actuator operates to the close position when connected in reverse.
Categories
- Manuals Home
- Hyundai Genesis Owners Manual
- Hyundai Genesis Service Manual
- Heating, Ventilation and Air Conditioning
- Smart Cruise Control Unit Repair procedures
- Active Air Flap(AAF) Repair procedures
- New on site
- Most important about car
