Hyundai Genesis (DH): Cooling System / Active Air Flap(AAF) Repair procedures
Hyundai Genesis (DH) 2013-2016 Service Manual / Engine Mechanical System / Cooling System / Active Air Flap(AAF) Repair procedures
| Removal and Installation |
| 1. |
Disconnect the battery "-" terminal from the trunk room. |
| 2. |
Remove the front bumper.
(Refer to Body - "Front Bumper Cover") |
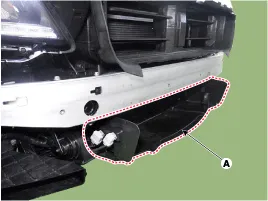
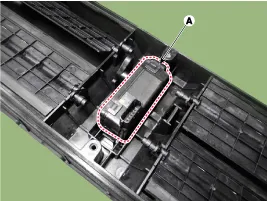
| 3. |
Disconnect the connector and remove the lower air guard (A).
|
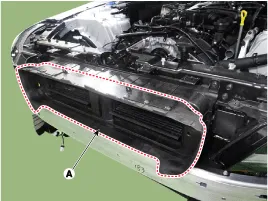
| 4. |
Remove the active air flap (AAF) assembly (A) and disconnect the connector (B).
|

| 5. |
To install, reverse the removal procedure. |
| 6. |
After installation, perform the "Actuation test" using GSD to check on the system. |
| Disassembly |
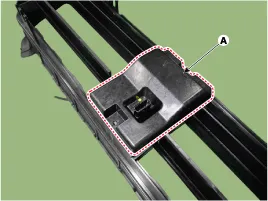
| 1. |
Loosen the fixing screw and then remove the active air flap rear cover (A).
|

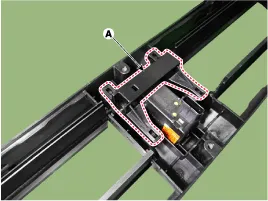
| 2. |
Remove the active air flap actuator cover (A).
|
| 3. |
Remove the active air link (A).
|
| 4. |
Remove the active air actuator (A).
|
| 5. |
To install, reverse the removal procedure. |
Schematic Diagram Circuit Diagram
Troubleshooting SymptomsPossible CausesRemedyWarning illuminated"Check active air flap system"Active Air Flap System Fail(Flap stuck)
Other information:
Hyundai Genesis (DH) 2013-2016 Service Manual: Refrigerant Line Repair procedures
Replacement 1. Discharge refrigerant from refrigeration system. 2. Replace any faulty tubes or hoses. Cap the open fittings immediately to keep moisture or dirt out of the system. 3. Tighten the bolt or nut joint to the specified torque.
Hyundai Genesis (DH) 2013-2016 Service Manual: Heater Unit Repair procedures
R
Categories
- Manuals Home
- Hyundai Genesis Owners Manual
- Hyundai Genesis Service Manual
- Description and Operation
- Repair procedures
- Front Door
- New on site
- Most important about car

Copyright © 2026 www.hgenesisdh.com - 0.0171