Hyundai Genesis (DH): Front Suspension System / Sub Frame Repair procedures

Removal
1.
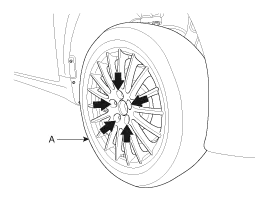
Loosen the wheel nuts slightly. Raise the vehicle, and make sure it is securely supported.
2.
Remove the front wheel and tire (A) from the front hub.

Tightening torque:
88.3 ~ 107.9 N.m (9.0 ~ 11.0 kgf.m, 65.1 ~ 79.6 lb-ft)

   
Be careful not to damage the hub bolts when removing the front wheel and tire.
3.
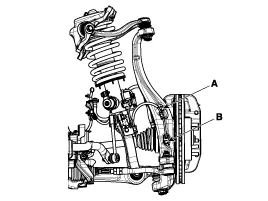
Remove the wheel speed sensor by loosening the wheel speed sensor bracket bolt (A) and wheel speed sensor mounting bolt (B).
[4WD]

Tightening torque:
6.9 ~ 10.8 N.m (0.7 ~ 1.1 kgf.m, 5.1 ~ 8.0 lb-ft)

4.
Loosen the wheel speed sensor bracket bolt and then disconnect the wheel speed sensor connector(A).
[2WD]

Tightening torque:
6.9 ~ 10.8 N.m (0.7 ~ 1.1 kgf.m, 5.1 ~ 8.0 lb-ft)

5.
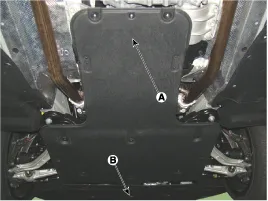
Remove the under cover (A) & (B).

6.
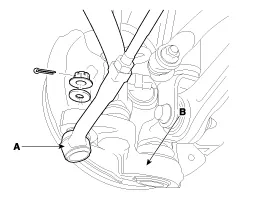
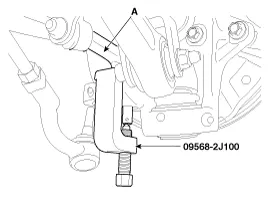
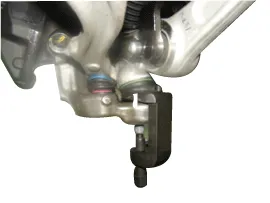
Remove the tie rod end ball joint from the knuckle.
(1)
Remove the split pin
(2)
Remove the castle nut
(3)
Disconnect the ball joint (A) from knuckle (B) using the special tool (09568-2J100).

Tightening torque:
88.3 ~ 107.9 N.m (9.0 ~ 11.0 kgf.m, 65.1 ~ 79.6 lb-ft)

   
Apply a few drops of oil to the special tool. (Boot contact part)
7.
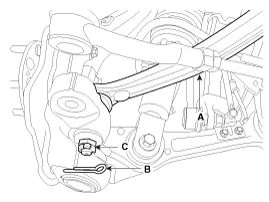
Remove the tension arm (A) from the knuckle by using the SST (09568-2J100).
[2WD]
(1)
Remove the split pin (B).
(2)
Remove the castle nut (C).
(3)
Disconnect the ball joint from knuckle using the special tool (09568-2J100).

Tightening torque:
88.3 ~ 107.9 N.m (9.0 ~ 11.0 kgf.m, 65.1 ~ 79.6 lb-ft)

8.
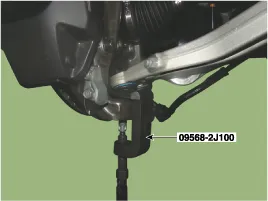
Loosen the nut and then remove the compression arm using SST (09568-2j100).
[4WD]

Tightening torque:
88.3 ~ 107.9 N.m (9.0 ~ 11.0 kgf.m, 65.1 ~ 79.6 lb-ft)

9.
Loosen the nut and then remove the lateral arm using SST (09568-2j100).

Tightening torque:
88.3 ~ 107.9 N.m (9.0 ~ 11.0 kgf.m, 65.1 ~ 79.6 lb-ft)

[2WD]

[4WD]

10.
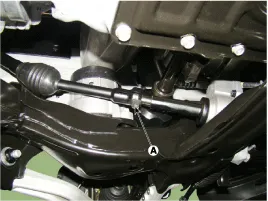
Unscrew the steering universal joint bolt (A) to disconnect the universal joint assembly from the steering gear box.

Tightening torque:
32.4 ~ 37.3N.m (3.3 ~ 3.8 kgf.m, 23.9 ~ 27.5lb-ft)


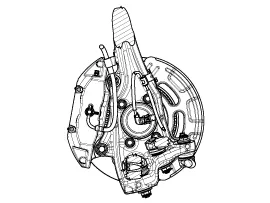
    Removal 1. Loosen the wheel nuts slightly. Raise the vehicle, and make sure it is securely supported. 2. Remove the front wheel and tire (A) from the front hub.

    Other information:

    Hyundai Genesis (DH) 2013-2016 Service Manual: Heater Unit Components and Components Location

    Component Location Components (1) 1. Shower duct (Left)2. Mode actuator (LH)3. Temperature control actuator (LH)4. Temperature door lever (Left)5. Mode actuator (A)6. Console temperature actuator (A)7. Console mode actuator ON/OFF8. Heater case (Left)9.

    Hyundai Genesis (DH) 2013-2016 Service Manual: Heater & A/C Control Unit Repair procedures

    Self Diagnosis 1. Self-diagnosis process 2. How to read self-diagnostic code After the display panel blinks three times every 0.5 second, the corresponding fault code blinks on the setup temperature display panel every 0.5 second and will show two figures.

    Categories

     
    Copyright В© 2026 www.hgenesisdh.com - 0.0242