Hyundai Genesis (DH): Power Trunk Module / Power Trunk Open/Close Switch Repair procedures
Hyundai Genesis (DH) 2013-2016 Service Manual / Body Electrical System / Power Trunk Module / Power Trunk Open/Close Switch Repair procedures
| Inspection |
| 1. |
Remove the crash pad lower panel.
(Refer to Body - "Crash Pad Lower Panel") |
| 2. |
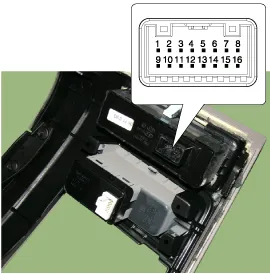
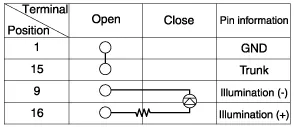
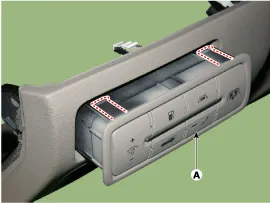
Check for continuity between terminals (A) of the power trunk switch.
|
| Removal |
| 1. |
Disconnect the negative (-) battery terminal. |
| 2. |
Remove the crash pad lower panel.
(Refer to Body - "Crash Pad Lower Panel") |
| 3. |
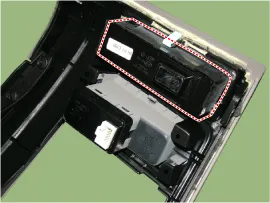
Remove the crash pad lower panel switch (A) after disengaging the mounting clip.
|

| Installation |
| 1. |
Install the side crash pad switch assembly. |
| 2. |
Install the crash pad lower panel. |
| 3. |
Connect the negative (-) battery terminal. |
Troubleshooting Diagnosis And Testing - Power Trunk Lid System The power trunk lid system is a complex system containing many components. In order to perform accurate testing, or receive outputs the power trunk lid control module must be checked.
Categories
- Manuals Home
- Hyundai Genesis Owners Manual
- Hyundai Genesis Service Manual
- Engine Mechanical System
- Active Air Flap(AAF) Repair procedures
- Starter Repair procedures
- New on site
- Most important about car

Copyright © 2026 www.hgenesisdh.com - 0.025