Hyundai Genesis (DH): Power Trunk Module / Power Latch Assembly Repair procedures
Hyundai Genesis (DH) 2013-2016 Service Manual / Body Electrical System / Power Trunk Module / Power Latch Assembly Repair procedures
| Removal |
| 1. |
Disconnect the negative (-) battery terminal. |
| 2. |
Remove the trunk lid trim after opening the trunk.
(Refer to Body - "Trunk Lid Trim") |
| 3. |
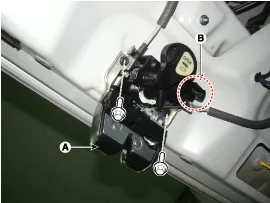
Remove the power latch (A) after disconnecting the connector (B) and mounting bolts.
|
| 4. |
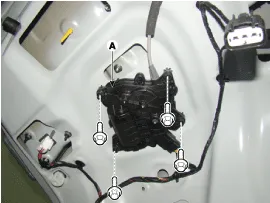
Remove the power cinching actuator (A) after disconnecting connector and mounting bolts.
|
| Installation |
| 1. |
Install the power latch after connecting the connector and mounting bolts. |
| 2. |
Install the trunk trim. |
| 3. |
Check that the power trunk module operates normally after connecting the negative (-) battery terminal. |
| Inspection |
| 1. |
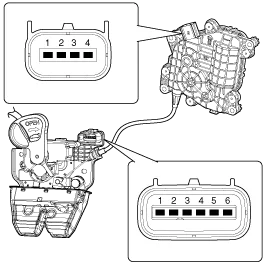
Disconnect the power latch and cinching connectors.
|
| 2. |
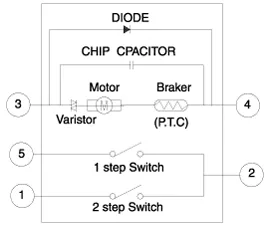
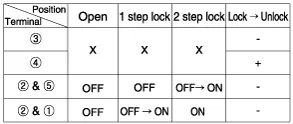
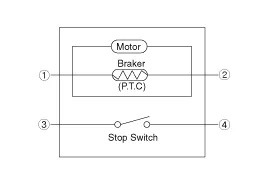
Connect the power latch terminals directly to battery voltage (12V) and check that the motor operates smoothly.
|
| 3. |
Connect the power cinching terminals directly to battery voltage (12V) and check that the motor operates smoothly.
|
Power Latch Assembly Inspection with GDS
| 1. |
In the body electrical system, failure can be quickly diagnosed by using the vehicle diagnostic system (GDS).
|
| 2. |
Select the 'Car model' and the system to be checked in order to check the vehicle with the tester. |
| 3. |
Select the 'Power Trunk Module(PTM)' to check the Power trunk module(PTM). |
| 4. |
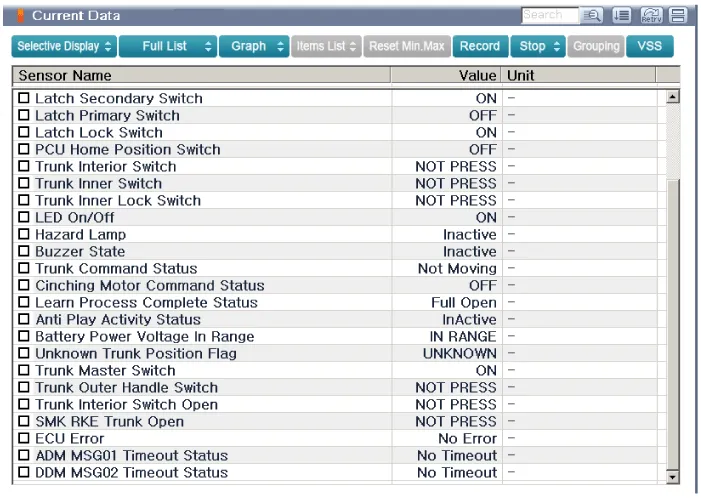
Select the "Current date" menu to search the current state of the input/output data.
The input/output data for the sensors corresponding to the Power Trunk Module(PTM) can be checked.
|
Description 1. Power latch lock flow A. When the trunk being open closes, the striker get locked. B. The CLAW rotates (1st step close). C.
Categories
- Manuals Home
- Hyundai Genesis Owners Manual
- Hyundai Genesis Service Manual
- Brake System
- 4 Wheel Drive (AWD) System
- Engine Mechanical System
- New on site
- Most important about car
Copyright В© 2026 www.hgenesisdh.com - 0.0239

