Hyundai Genesis (DH): Lighting System / High Mounted Stop Lamp Repair procedures
Hyundai Genesis (DH) 2013-2016 Service Manual / Body Electrical System / Lighting System / High Mounted Stop Lamp Repair procedures
| Removal |
| High Mounted Stop Lamp |
| 1. |
Disconnect the negative (-) battery terminal. |
| 2. |
Remove the roof trim assembly.
(Refer to Body - "Roof Trim") |
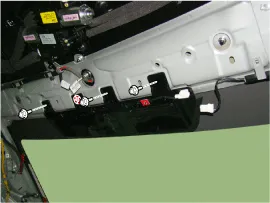
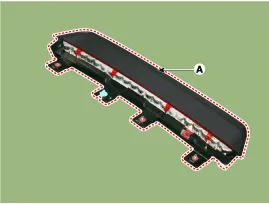
| 3. |
Remove the high mounted stop lamp assembly (A) after loosening the mounting screws.
|
| Installation |
| 1. |
Install the high mounted stop lamp. |
| 2. |
Install the roof trim assembly. |
| 3. |
Connect the negative (-) battery terminal. |
Removal 1. Disconnect the negative (-) battery terminal. 2. Remove the trunk lid panel. (Refer to Body - "Trunk Lid Back Panel") 3. Remove the license lamp after disengaging the license lamp mounting clip (A) 4.
Removal 1. Disconnect the negative (-) battery terminal. 2. After loosening the nuts (4EA) holding the rear combination lamp and disconnecting the connector (A), remove the outside rear combination lamp assembly.
Other information:
Hyundai Genesis (DH) 2013-2016 Service Manual: Compressor oil Repair procedures
Oil Specification 1. The HFC-134a system requires synthetic (PAG) compressor oil whereas the R-12 system requires mineral compressor oil. The two oils must never be mixed. 2. Compressor (PAG) oil varies according to compressor model. Be sure to use oil specified for the compressor model.
Hyundai Genesis (DH) 2013-2016 Service Manual: Auto Defogging Sensor Repair procedures
R
Categories
- Manuals Home
- Hyundai Genesis Owners Manual
- Hyundai Genesis Service Manual
- Description and Operation
- 4 Wheel Drive (AWD) System
- Heating, Ventilation and Air Conditioning
- New on site
- Most important about car

Copyright © 2026 www.hgenesisdh.com - 0.0285