Hyundai Genesis: Rear Suspension System / Trailing Arm Repair procedures
Hyundai Genesis (DH) 2013-2016 Service Manual / Suspension System / Rear Suspension System / Trailing Arm Repair procedures
| Removal |
| 1. |
Loosen the wheel nuts slightly. Raise the vehicle, and make sure it is securely supported. |
| 2. |
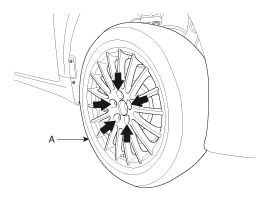
Remove the front wheel and tire (A) from the rear hub.
|

| 3. |
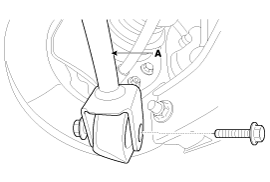
Loosen the bolt & lock nut and remove the trailing arm (A).
|
| 4. |
Loosen the flange bolt and then remove the trailing arm.
|
| 5. |
Installation in the reverse order of removal. |
| 6. |
Check the alignment.
(Refer to Tires/Wheels - "Alignment") |
| Inspection |
| 1. |
Check the bushing for wear and deterioration. |
| 2. |
Check the trailing arm deformation. |
| 3. |
Check the all bolts. |
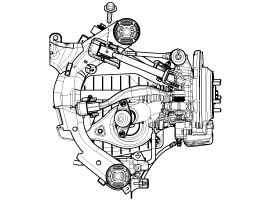
 Rear Assist Arm Repair procedures
Removal
1.
Loosen the wheel nuts slightly. Raise the vehicle, and make sure it is securely supported.
2.
Remove the front wheel and tire (A) from the rear hub.
Tightening torque:
88.3 ~ 10 ...
 Rear Lower Arm Repair procedures
Removal
1.
Loosen the wheel nuts slightly. Raise the vehicle, and make sure it is securely supported.
2.
Remove the front wheel and tire (A) from the rear hub.
Tightening torque:
88.3 ~ 10 ...
Other information:
Hyundai Genesis (DH) 2013-2016 Service Manual: Components and Components Location
Components [Monitor Type] 1. Front seat headrest2. Front seat headrest guide3. Front seat back board4. Rear monitor assembly5. Front seat back pad6. Front seat back cover7. Front seat back frame assembly8. Front seat shield inner cover9. Front seat belt buckle 10. Front seat cushion frame as ...
Hyundai Genesis (DH) 2013-2016 Owners Manual: Electric chromic mirror (ECM) with HomeLink® system, compass and Blue Link® (for U.S.A)
Your vehicle may be equipped with a Gentex Automatic-Dimming Mirror with a Z-Nav™ Electronic Compass Display and an Integrated HomeLink® Wireless Control System. During nighttime driving, this feature will automatically detect and reduce rearview mirror glare while the compass ind ...
© 2013-2025 www.hgenesisdh.com
