Hyundai Genesis (DH): SRSCM / Seat Belt Buckle Switch (BS) Repair procedures
Hyundai Genesis (DH) 2013-2016 Service Manual / Restraint / SRSCM / Seat Belt Buckle Switch (BS) Repair procedures
| Removal |
| 1. |
Disconnect the battery negative cable, and wait for at least three minutes before beginning work. |
| 2. |
Remove the front seat assembly.
(Refer to Body - "Front Seat Assembly") |
| 3. |
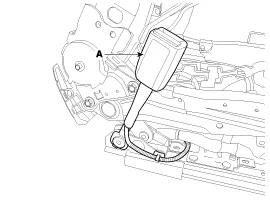
Remove the seat belt buckle switch.
(Refer to Body - "Front Seat Belt Buckle")
|
| Installation |
Be sure to install the harness wires so they will not pinch or interfere with other parts.
|

| 1. |
Turn the ignition switch OFF. |
| 2. |
Disconnect the battery negative cable, and wait for at least three minutes before beginning work. |
| 3. |
Install the seat belt buckle switch.
(Refer to Body - "Front Seat Belt Buckle") |
| 4. |
Install the front seat assembly.
(Refer to Body - "Front Seat Assembly") |
| 5. |
Reconnect the battery negative cable. |
| 6. |
After installing the seat belt buckle switch, confirm proper system operation:
Turn the ignition switch ON; the SRS indicator should turn on for about six seconds and then go off. |
Description In order to make normal activation of airbag system, SRSCM detects DTC(s) for the Occupant Classification System (OCS). If the seat is occupied, OCS detects passenger presences status and send signal to SRSCM via CAN.
Other information:
Hyundai Genesis (DH) 2013-2016 Service Manual: Blind Spot Detection Indicator Components and Components Location
C
Hyundai Genesis (DH) 2013-2016 Service Manual: Mode Control Actuator Repair procedures
Inspection 1. Turn the ignition switch OFF. 2. Disconnect the mode control actuator connector. 3. Verify that the mode control actuator operates to the defrost mode when connecting 12V to terminal 3 and grounding terminal 4. Verify that the mode control actuator operates to the vent mode when connected in reverse.
Categories
- Manuals Home
- Hyundai Genesis Owners Manual
- Hyundai Genesis Service Manual
- Steering System
- Body Electrical System
- Front Door
- New on site
- Most important about car

Copyright © 2026 www.hgenesisdh.com - 0.0222