Hyundai Genesis (DH): Brake System / Master Cylinder Repair procedures
Hyundai Genesis (DH) 2013-2016 Service Manual / Brake System / Brake System / Master Cylinder Repair procedures
| Removal |
| 1. |
Turn ignition switch OFF and disconnect the negative (-) battery cable. |
| 2. |
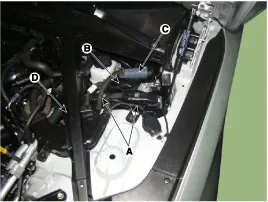
Disconnect the ECM connector (A) and TCM connector (B). IDB (C) and then remove the noise barrier (D).
|
| 3. |
Remove the Cowl Top Cover.
(Refer to Body - "Cowl Top Cover") |
| 4. |
Remove the ECM, TCM & IDB. |
| 5. |
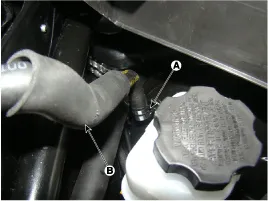
Remove the clamp (A) and brake vacuum hose (B).
|
| 6. |
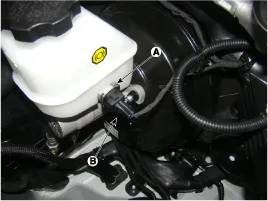
Remove the clip (A) and then disconnect brake fluid level switch connector (B).
|
| 7. |
Remove the brake fluid from the master cylinder reservoir with a syringe.
|

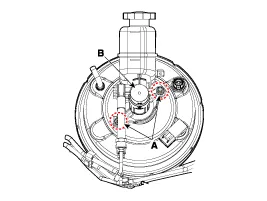
| 8. |
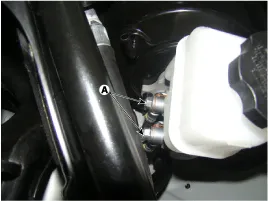
Loosen the hose connecting bolt (A) and disconnect the brake tube.
|
| 9. |
Remove the master cylinder (B) from the brake booster after loosening the mounting nuts (A).
|
| Installation |
| 1. |
To install, reverse the removal procedure. |
| 2. |
After installation, bleed the brake system.
(Refer to Brake System - "Brake System Bleeding") |
Components 1. Reservoir cap2. Reservoir3. Grommet4. Master cylinder
Categories
- Manuals Home
- Hyundai Genesis Owners Manual
- Hyundai Genesis Service Manual
- Front Door
- Emission Control System
- Repair procedures
- New on site
- Most important about car

Copyright © 2026 www.hgenesisdh.com - 0.0292