Hyundai Genesis (DH): Seat Electrical / Seat heater switch Repair procedures
Hyundai Genesis (DH) 2013-2016 Service Manual / Body Electrical System / Seat Electrical / Seat heater switch Repair procedures
| Removal |
Front Seat
| 1. |
Disconnect the battery (-)terminals. |
| 2. |
Remove the floor console upper cover.
(Refer to Body - "Floor Console Assembly")
|
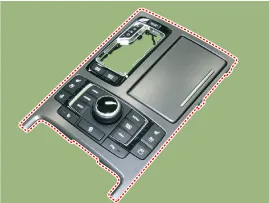
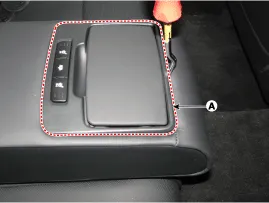
| 3. |
Disconnect the connecter and screw and remove the seat heater switch assembly (A).
|
Rear Seat Armrest Switch
| 1. |
Disconnect the negative (-) battery terminal. |
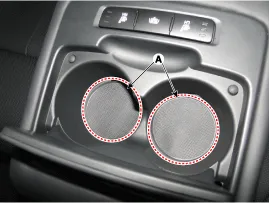
| 2. |
Remove the drink holder pad (A).
|
| 3. |
Loosen the mounting screws (A).
|
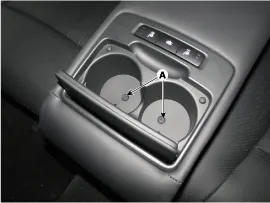
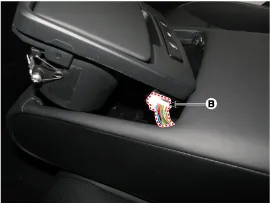
| 4. |
Using a screwdriver or remover, remove the rear seat armrest drink holder assembly (A).
|
| 5. |
Disconnect the connector (B).
|
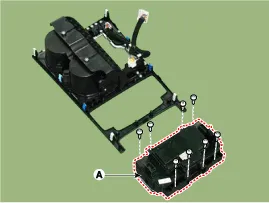
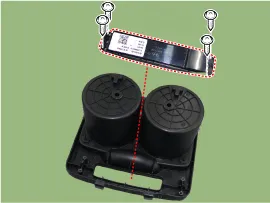
| 6. |
Remove the seat heat switch (A) after loosening the mounting screws.
|
| Inspection |
| 1. |
Power seat switch sends/receives signals via CAN
communication so it is impossible to check the electric current of
switch components. |
| 2. |
Inspect the seat heater system using GDS.
Circuit Diagram Component Location 1. Heating ventilation blower2. Heating ventilation blower ECU3. Thermoelectric element [TED] Other information:Hyundai Genesis (DH) 2013-2016 Service Manual: SpecificationsS Hyundai Genesis (DH) 2013-2016 Service Manual: Refrigerant Line Repair proceduresReplacement 1. Discharge refrigerant from refrigeration system. 2. Replace any faulty tubes or hoses. Cap the open fittings immediately to keep moisture or dirt out of the system. 3. Tighten the bolt or nut joint to the specified torque. Categories

Copyright © 2026 www.hgenesisdh.com - 0.0216
|
