Hyundai Genesis (DH): Lighting System / Rheostat Repair procedures
Hyundai Genesis (DH) 2013-2016 Service Manual / Body Electrical System / Lighting System / Rheostat Repair procedures
| Inspection |
| 1. |
Disconnect the negative (-) battery terminal. |
| 2. |
Remove the crash pad lower panel.
(Refer to Body - "Crash Pad Lower Panel") |
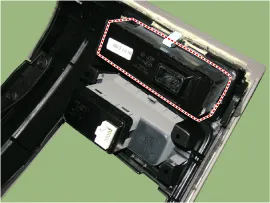
| 3. |
Remove the lower crash pad switch assembly (A) after disengaging the mounting clip.
|
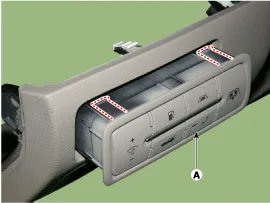
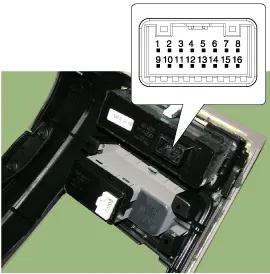
| 4. |
Remove the rheostat switch connector (A).
|
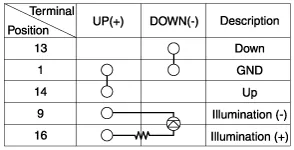
| 5. |
Check for intensity of new rheostat switch. If the light
intensity of the lamps changes smoothly without any flickering when the
rheostat is turned, it can be assumed that the rheostat is normal.
|
Components
Removal 1. Disconnect the negative (-) battery terminal. 2. Remove the front bumper. (Refer to Body - "Front Bumper Cover") 3. Disconnect the front fog lamp connector (A).
Categories
- Manuals Home
- Hyundai Genesis Owners Manual
- Hyundai Genesis Service Manual
- Repair procedures
- Front Door
- Electric Parking Brake (EPB) Repair procedures
- New on site
- Most important about car

Copyright © 2026 www.hgenesisdh.com - 0.0265