Hyundai Genesis (DH): Rear Door / Rear Door Module Repair procedures
Hyundai Genesis (DH) 2013-2016 Service Manual / Body (Interior and Exterior) / Rear Door / Rear Door Module Repair procedures
| Replacement |
| 1. |
Remove the rear door window glass.
(Refer to Rear Door - "Rear Door Window Glass") |
| 2. |
Remove the rear door outside handle.
(Refer to Rear Door - "Rear Door Outside Handle") |
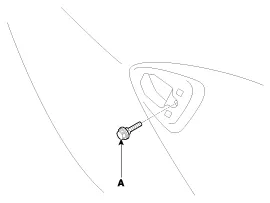
| 3. |
Loosen the rear door outside handle base mounting bolt (A).
|
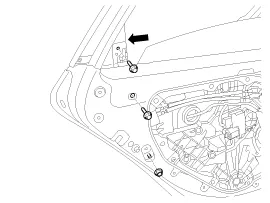
| 4. |
After loosening the mounting bolts and nuts, remove the rear door outside handle by pulling upward the rear door channel (A).
|

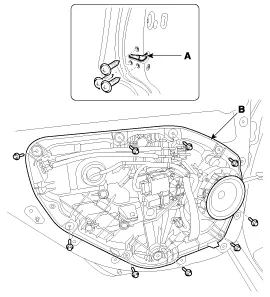
| 5. |
Loosen the rear door latch (A) mounting screws. |
| 6. |
After loosening the mounting bolts, remove the rear door module (B).
|
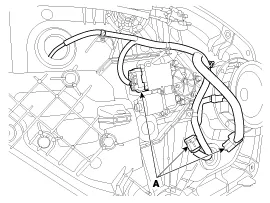
| 7. |
Disconnect the connectors (A) and front door module wiring harness.
|
| 8. |
Remove the rear door latch assembly.
(Refer to Front Door - "rear Door Latch") |
| 9. |
Remove the rear speaker .
(Refer to Body Electrical System - "Speakers") |
| 10. |
Remove the rear power window motor.
(Refer to Body Electrical System - "Power Window Motor") |
| 11. |
Install in the reverse order of removal.
|

