
Hyundai Genesis (DH): Charging System / Alternator Repair procedures
| Removal |
| 1. |
Turn ignition switch OFF and disconnect the negative (-) battery cable. |
| 2. |
Remove the engine cover. |
| 3. |
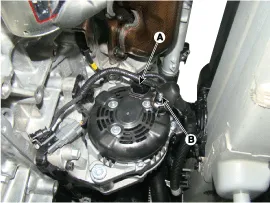
Disconnect the alternator connector (A) and cable (B) from the 'B' terminal.
|
| 4. |
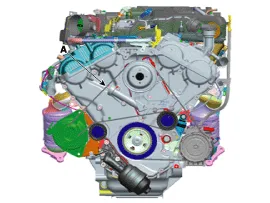
To release the tension, turn the drive belt tensioner counterclockwise and then remove the drive belt (A).
|
| 5. |
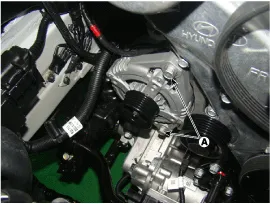
Remove the alternator after removing the mounting bolts (A).
|
| Installation |
| 1. |
Install in the reverse order of removal. |
| 2. |
Adjust the alternator belt tension after installation.
(Refer to Engine Mechanical System - "Drive Belt")
|
Circuit Diagram
Description [AGM Battery] AGM battery is used for especially heavy load on the vehicle network depending on equipment and requirements. AGM stands for Absorbent Glass Material Battery; that is absorbent glass fibre fleece.
Other information:
Hyundai Genesis (DH) 2013-2016 Service Manual: Photo Sensor Description and Operation
Description The photo sensor is located in the right side of the inside rearview mirror. he integrated rain sensor is located in the right side of the inside rearview mirror. The integrated rain sensor is a multifunctional sensor which combines the photo sensor and auto light sensor, and has a built-in photovoltaic diode (for detecting t
Hyundai Genesis (DH) 2013-2016 Service Manual: Auto Defogging Actuator Description and Operation
Description The auto defogging sensor is installed on front window glass. The sensor judges and sends signal if moisture occurs to blow out wind for defogging. The air conditioner control module receives a signal from the sensor and restrains moisture and eliminates defog by the intake actuator, A/C, auto defogging actuator, blower motor
Categories
- Manuals Home
- Hyundai Genesis Owners Manual
- Hyundai Genesis Service Manual
- Parking Assist Sensor Repair procedures
- Emission Control System
- Components and Components Location
- New on site
- Most important about car
