Hyundai Genesis (DH): Windshield Wiper/Washer / Windshield Wiper-Washer Switch Repair procedures
Hyundai Genesis (DH) 2013-2016 Service Manual / Body Electrical System / Windshield Wiper/Washer / Windshield Wiper-Washer Switch Repair procedures
| Removal |
| 1. |
Disconnect the negative (-) battery terminal. |
| 2. |
Remove the steering column upper shroud (A).
(Refer to Body - "Steering Column Shroud Panel")
|

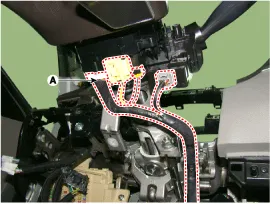
| 3. |
Disconnect the multifunction switch connector (A).
|
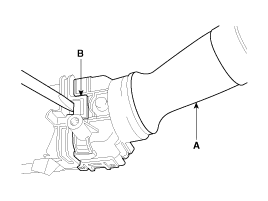
| 4. |
Remove the wiper switch (A) by pushing the lock pin (B).
|

| 5. |
If it is necessary to remove multifunction switch assembly, remove the steering wheel.
(Steering System - "Steering Column and Shaft") |
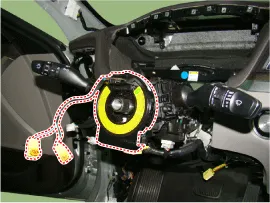
| 6. |
Remove the clock spring.
(Refer to Restraint - "Driver Airbag (DAB) Module and Clock Spring")
|
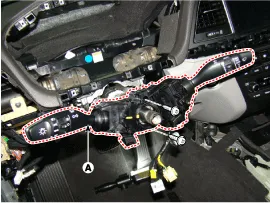
| 7. |
Loosen the screws (2EA) and remove the multifunction switch assembly (A).
|
| Installation |
| 1. |
Install the multifunction switch. |
| 2. |
Install the clock spring and steering wheel. |
| 3. |
Install the steering column upper and lower shrouds. |
| 4. |
Install the steering wheel. |
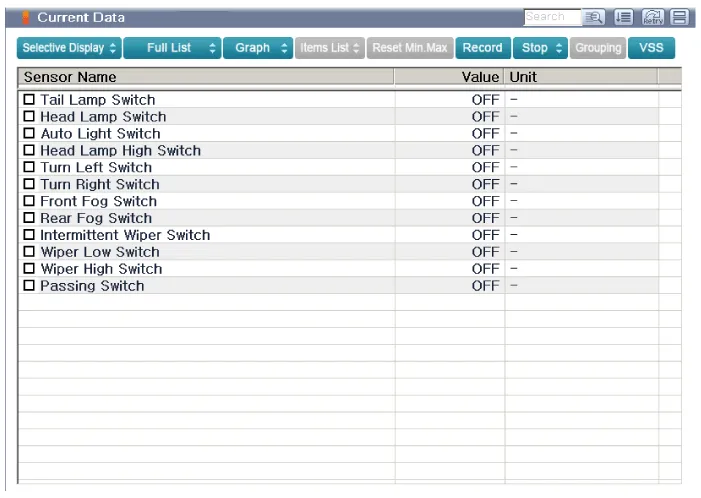
| Inspection (With GDS) |
| 1. |
Select the car model and "Body Control Module (BCM)" to check input data of 'Multi Function Switch (MFSW)'. |
| 2. |
Select "the Current Data". |
| 3. |
Check the current state of the input data of each Multi Function Switch.
|
Component Location 1. Windshield wiper arm & blade2. Wiper & washer switch3. Windshield washer hose & nolzzle4. Washer reservoir5. Washer motor6.
Component Location 1. Cap2. Nut3. Wiper arm & blade4. Rivet5. Cowl top cover6. Bolt7. Wiper motor & linkage assembly8. Wiper motor connector
Other information:
Hyundai Genesis (DH) 2013-2016 Service Manual: Components and Components Location
C
Hyundai Genesis (DH) 2013-2016 Service Manual: Troubleshooting
Troubleshooting Problem Symptoms Table Before replacing or repairing air conditioning components, first determine if the malfunction is due to the refrigerant charge, air flow or compressor. Use the table below to help you find the cause of the problem.
Categories
- Manuals Home
- Hyundai Genesis Owners Manual
- Hyundai Genesis Service Manual
- Body Electrical System
- Description and Operation
- Engine Mechanical System
- New on site
- Most important about car

Copyright © 2026 www.hgenesisdh.com - 0.03