Hyundai Genesis: Timing System / Timing Chain Repair procedures
Hyundai Genesis (DH) 2013-2016 Service Manual / Engine Mechanical System / Timing System / Timing Chain Repair procedures
| Removal |
| 1. |
Set No.1 cylinder to top dead center (TDC)/compression.
|
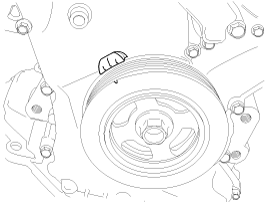

| 2. |
Remove the timing chain cover.
(Refer to Timing System - "Timing Chain Cover")
|
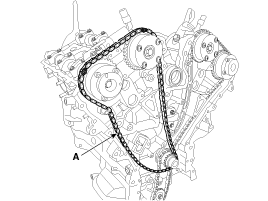
| 3. |
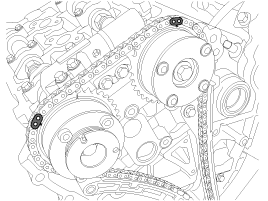
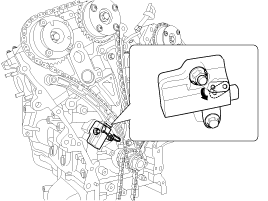
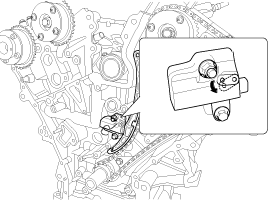
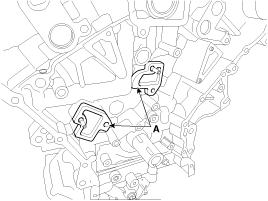
Lower the tensioner link (A), compress the piston of the RH timing chain tensioner, and fix the tensioner with a fixing pin.
|
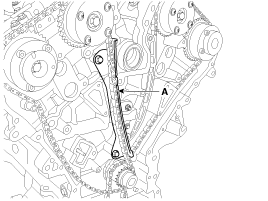
| 4. |
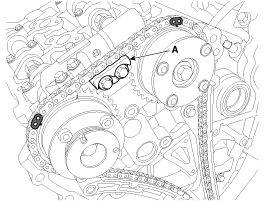
Remove the RH timing chain cam to cam guide (A).
|
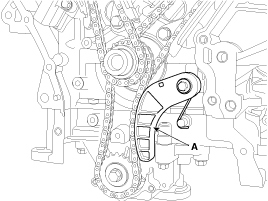
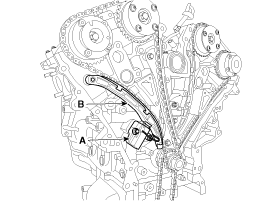
| 5. |
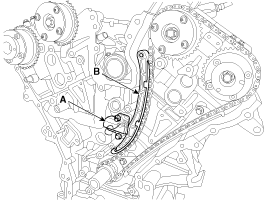
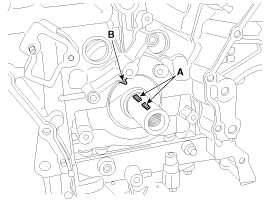
Remove the RH timing chain auto tensioner (A) and the RH timing chain tensioner arm (B).
|

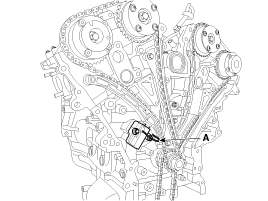
| 6. |
Remove the RH timing chain guide (A).
|

| 7. |
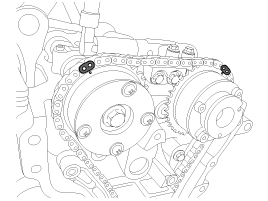
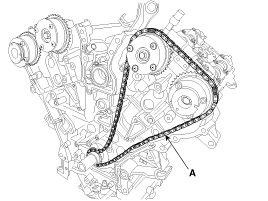
Remove the RH timing chain (A).
|

| 8. |
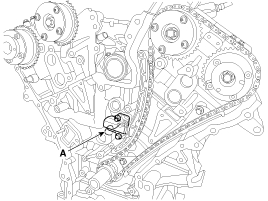
Remove the oil pump chain tensioner assembly (A).
|
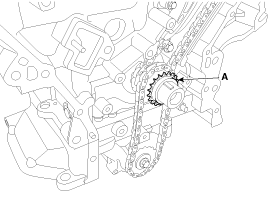
| 9. |
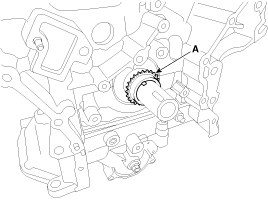
Remove the RH crankshaft chain sprocket (A).
|
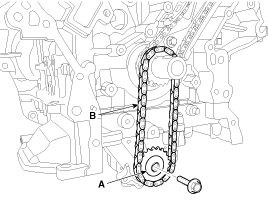
| 10. |
Remove the oil pump chain sprocket (A) and oil pump chain (B).
|
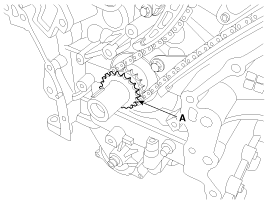
| 11. |
Remove the crankshaft sprocket (A). (O/P & RH camshaft drive)
|
| 12. |
Install a set pin after compressing the LH timing chain tensioner.
|
| 13. |
Remove the LH timing chain cam to cam guide (A).
|
| 14. |
Remove the LH timing chain auto tensioner (A) and LH timing chain tensioner arm (B).
|
| 15. |
Remove the LH timing chain guide (A).
|

| 16. |
Remove the LH timing chain (A).
|
| 17. |
Remove the crankshaft sprocket (A). (LH camshaft drive)
|

| 18. |
Remove the timing chain auto tensioner assembly adapter (A).
|
| Inspection |
Sprockets, Chain Tensioner, Chain Guide, Chain Tensioner Arm
| 1. |
Check the camshaft sprocket and crankshaft sprocket for abnormal wear, cracks, or damage. Replace as necessary |
| 2. |
Inspect the tensioner arm and chain guide for abnormal wear, cracks, or damage. Replace as necessary. |
| 3. |
Check that the chain tensioner piston moves smoothly and that the ratchet operates normally. Replace as necessary. |
| Installation |
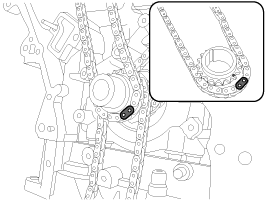
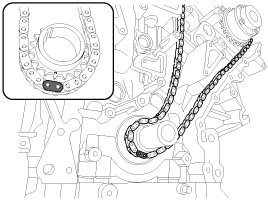
| 1. |
The key (A) of crankshaft should be aligned with the timing
mark (B) of timing chain cover. As a result of this, the piston of No.1
cylinder is placed at the top dead center on compression stroke.
|
| 2. |
Install the timing chain auto tensioner assembly adapter (A).
|

| 3. |
Install the crankshaft sprocket (A). (LH camshaft drive).
|
| 4. |
Install the LH timing chain (A).
|

| 5. |
Install the LH timing chain guide (A).
|
| 6. |
Install the LH timing chain tensioner arm (B) and LH timing chain auto tensioner (A).
|
| 7. |
Install the timing chain cam to cam guide (A).
|
| 8. |
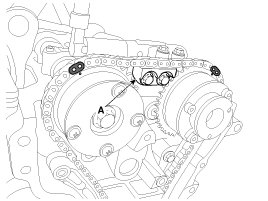
Remove the LH timing chain auto tensioner stopper pin (A).
|
| 9. |
Install the crankshaft sprocket (A).
|

| 10. |
Install the oil pump chain sprocket (A) and oil pump chain (B).
|

| 11. |
Install the oil pump chain tensioner assembly (A).
|
| 12. |
Install the RH timing chain (A).
|
| 13. |
Install the RH timing chain guide (A).
|
| 14. |
Install the RH timing chain auto tensioner (A) and the RH timing chain tensioner arm (B).
|
| 15. |
Install the RH timing chain cam to cam guide (A).
|
| 16. |
Remove the RH timing chain auto tensioner stopper pin (A).
|
| 17. |
After rotating the crankshaft two times in regular direction (clockwise viewed from front), confirm the timing mark.
|
| 18. |
Install the timing chain cover.
(Refer to Timing System - "Timing Chain Cover") |
|
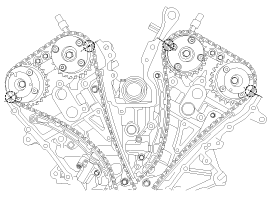
 Timing Chain Components and Components Location
Components
1. Oil pump sprocket2. Oil pump chain3. Oil pump tensioner assembly4. Crankshaft oil pump sprocket5. Crankshaft RH chain sprocket6. RH timing chain auto tensioner7. RH timing chain ten ...

Other information:
Hyundai Genesis (DH) 2013-2016 Service Manual: Rear Door Outside Handle Repair procedures
Replacement 1. Remove the hole plug (B). 2. After loosening the mounting bolt, then remove the rear door outside handle cover (A). Tightening torque : 6.9 ~ 10.8 N.m (0.7 ~ 1.1 kgf.m, 5.1 ~ 8.0 lb-ft) 3. Remove the rear door outside handle (A) by pushing it in the direction of arro ...
Hyundai Genesis (DH) 2013-2016 Owners Manual: Sports mode
Whether the vehicle is stationary or in motion, sports mode is selected by pushing the shift lever from the D (Drive) position into the manual gate. To return to D (Drive) range operation, push the shift lever back into the main gate. In Sports Mode, moving the shift lever backwards ...
© 2013-2025 www.hgenesisdh.com
