Hyundai Genesis (DH): Cooling System / Radiator Repair procedures
| Removal and Installation |
| 1. |
Disconnect the battery "-" terminal from the trunk room. |
| 2. |
Loosen the drain plug and drain the engine coolant.
(Refer to Cooling System - "Coolant") |
| 3. |
Remove the cooling fan.
(Refer to Cooling System - "Cooling fan") |
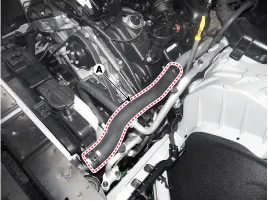
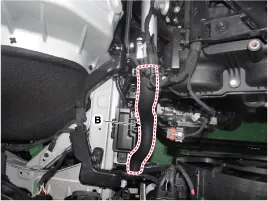
| 4. |
Disconnect the radiator upper hose (A) and lower hose (B).
|

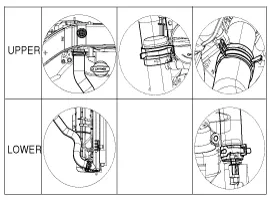
| 5. |
Remove the radiator upper mounting bracket.
|
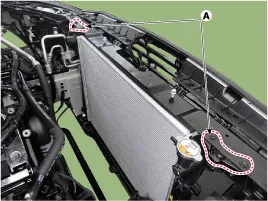
| 6. |
Remove the fixing bolts (A) between the radiator assembly and
the A/C condenser, and then remove the radiator (A) from the vehicle.
|

| 7. |
To install, reverse the removal procedure.
Fill the radiator with coolant and check for leaks. |
| Inspection |
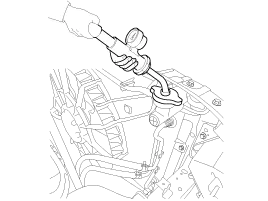
| 1. |
Remove the radiator cap, apply engine coolant to the seal, and then install a pressure tester on it.
|

| 2. |
Apply a pressure of 93.16 ~ 122.58 kPa (0.95 ~ 1.25 kg/cm?, 13.51 ~ 17.78 psi). |
| 3. |
Check the pressure for any changes. |
| 4. |
If the pressure drops, replace the cap. |
| 1. |
Wait for the engine to cool down, then carefully remove the
radiator cap and fill the radiator with engine coolant, then install the
pressure tester.
|
| 2. |
Apply a pressure tester to the radiator and apply a pressure of 93.16~122.58 kPa (0.95~1.25 kg/cm?, 13.51~17.78 psi). |
| 3. |
Inspect for engine coolant leaks and a drop in pressure. |
| 4. |
Remove the tester and reinstall the radiator cap.
|
Components 1. Radiator assembly2. Radiator upper mounting bracket3. Radiator lower mounting insulator4. Radiator cap5. Radiator lower hose6. Radiator upper hose7.
Removal and Installation 1. Disconnect the battery "-" terminal from the trunk room. 2. Remove the engine cover. 3. Remove the engine room cover.
Other information:
Hyundai Genesis (DH) 2013-2016 Service Manual: Repair procedures
Diagnosis With GDS 1. BSD system defects can be quickly diagnosed with the GDS. GDS operates actuator quickly to monitor, input/output value and self diagnosis. 2. Connect the cable of GDS to the data link connector in driver side crash pad lower panel, and turn on the GDS.
Hyundai Genesis (DH) 2013-2016 Service Manual: Compressor Description and Operation
Description The compressor is the power unit of the A/C system. It is located on the side of engine block and driven by a V-belt of the engine. The compressor changes low-pressure and low-temperature refrigerant gas into high-pressure and high-temperature refrigerant gas.
Categories
- Manuals Home
- Hyundai Genesis Owners Manual
- Hyundai Genesis Service Manual
- Front Door
- Electric Parking Brake (EPB) Repair procedures
- Restraint
- New on site
- Most important about car
