Hyundai Genesis (DH): Body Dimensions / Under Body Body Repair
Hyundai Genesis (DH) 2013-2016 Service Manual / Body (Interior and Exterior) / Body Dimensions / Under Body Body Repair
| Projected Dimensions |
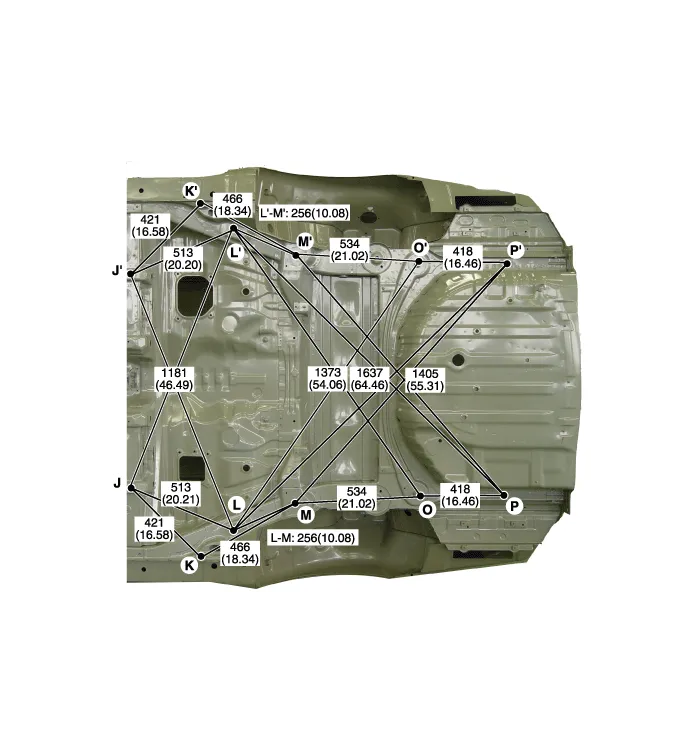
[2WD]
| * These dimensions indicated in this figure are actual-measurement dimensions. [ Unit : mm (inch) ] |
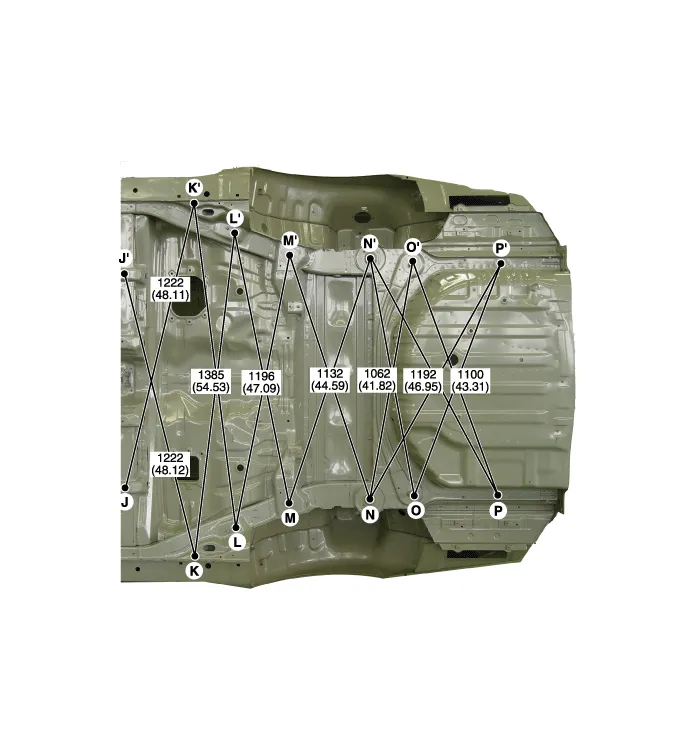
[4WD]
| Actual Measurement Dimensions |
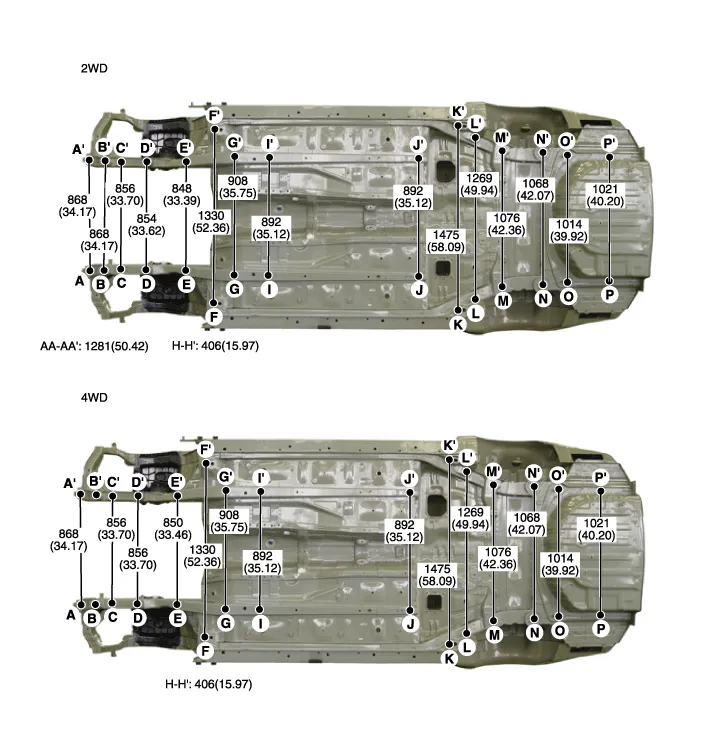
| * These dimensions indicated in this figure are actual-measurement dimensions. [ Unit : mm (inch) ] |
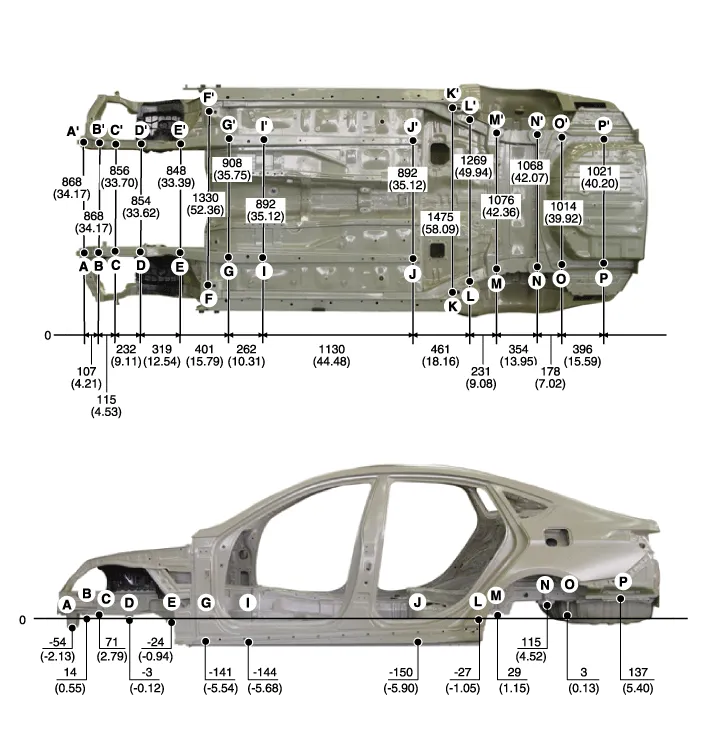
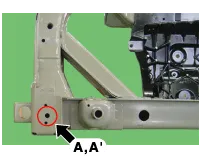
Front [2WD]
| * These dimensions indicated in this figure are actual-measurement dimensions. [ Unit : mm (inch) ] |
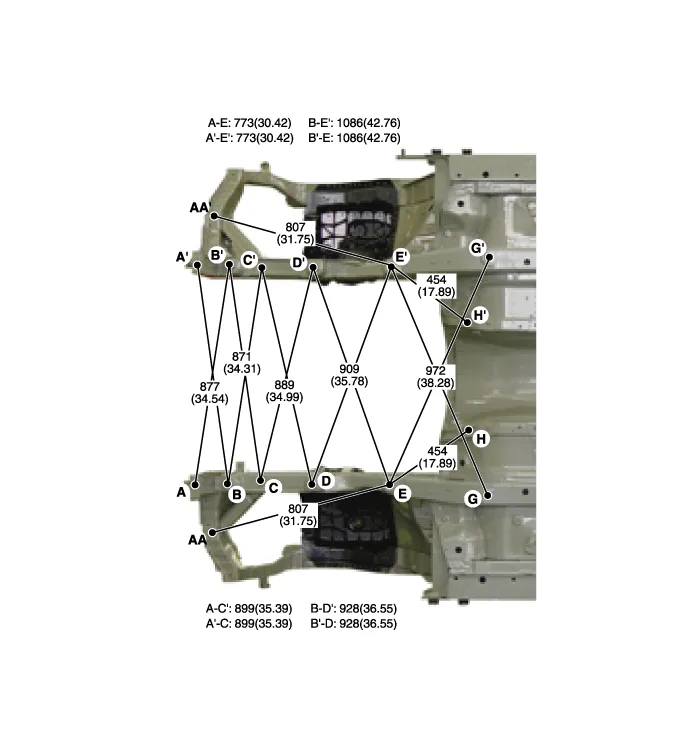
| * These dimensions indicated in this figure are actual-measurement dimensions. [ Unit : mm (inch) ] |
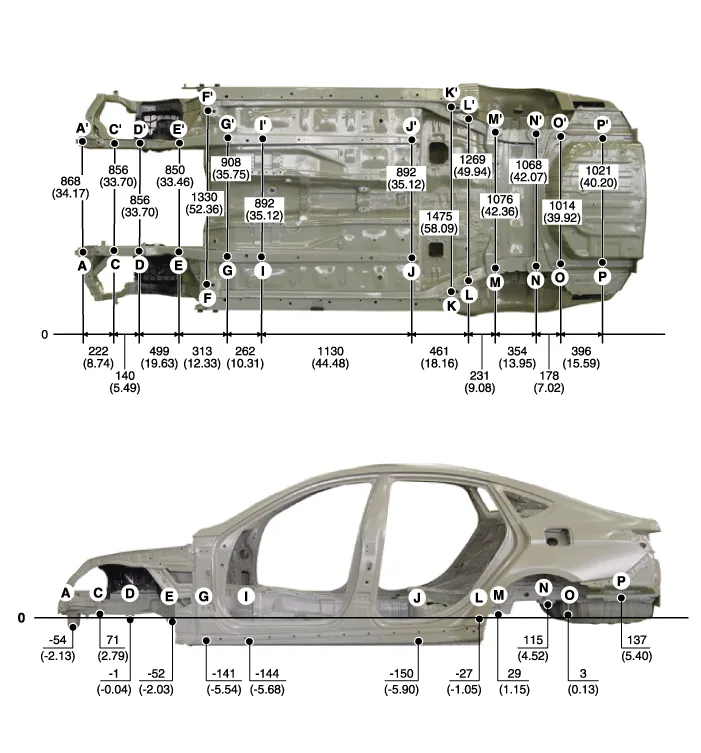
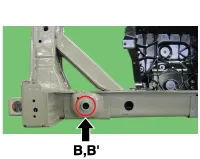
Front [4WD]
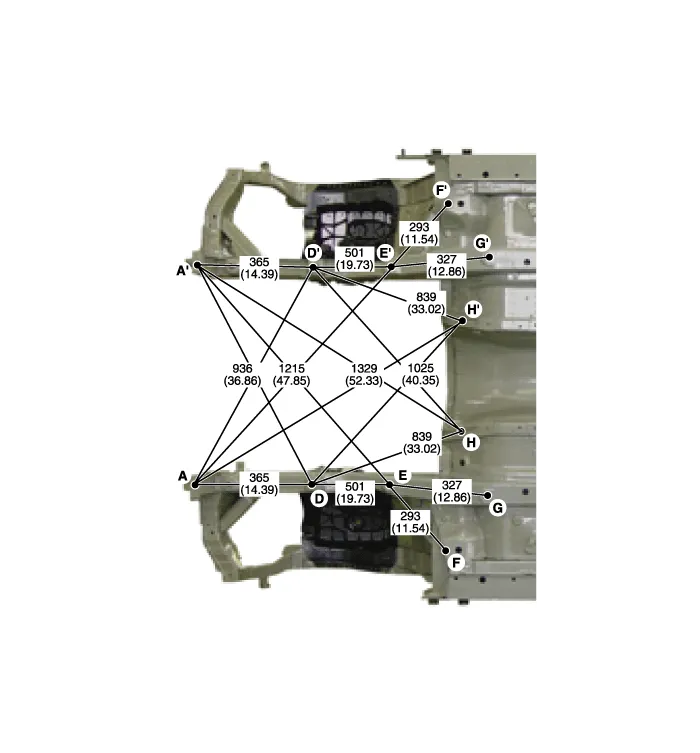
| * These dimensions indicated in this figure are actual-measurement dimensions. [ Unit : mm (inch) ] |
| * These dimensions indicated in this figure are actual-measurement dimensions. [ Unit : mm (inch) ] |
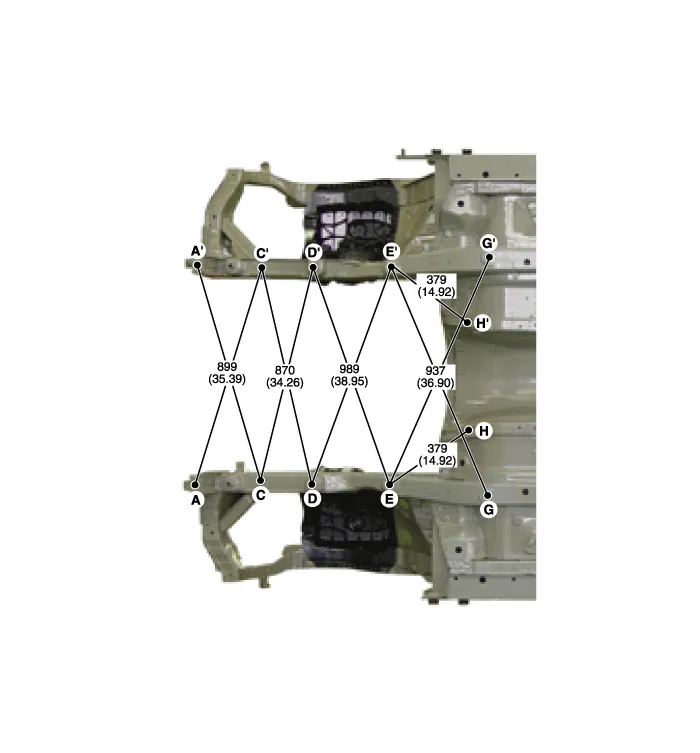
Center [2/4WD]
| * These dimensions indicated in this figure are actual-measurement dimensions. [ Unit : mm (inch) ] |
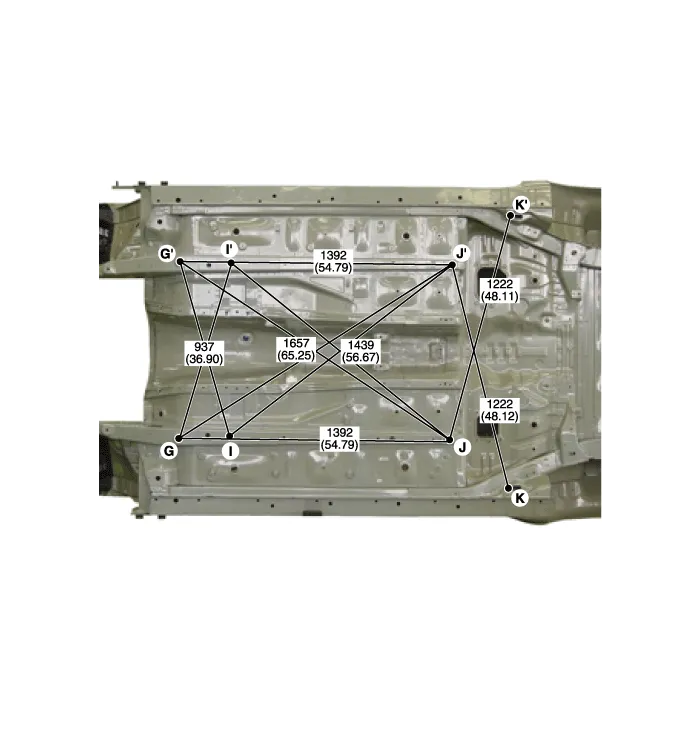
Rear [2/4WD]
| * These dimensions indicated in this figure are actual-measurement dimensions. [ Unit : mm (inch) ] |
| * These dimensions indicated in this figure are actual-measurement dimensions. [ Unit : mm (inch) ] |
|
|
|
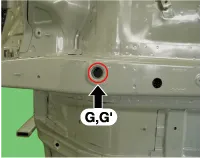
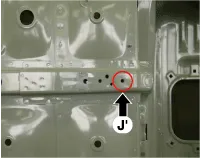
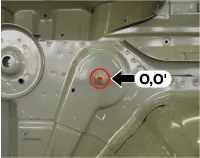
| Fender apron panel tooling hole (O16) [Only 2WD] | Fender apron panel tooling hole (O9) | Front sub frame mounting hole (O16) |
|
|
|
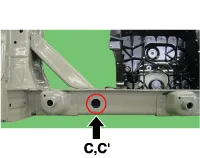
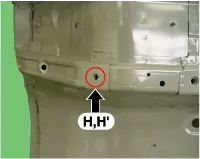
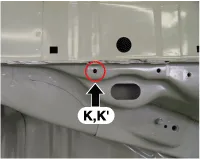
| Front side member tooling hole (O25) | Front sub frame mounting pipe | Front sub frame mounting hole (O16) |
|
|
|
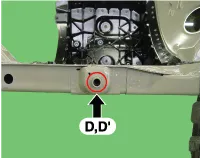
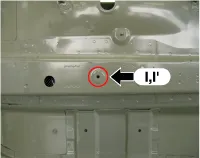
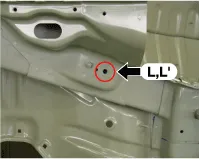
| Floor under cover mounting hole (O6.6) | Front sub frame mounting hole (O36) | Center floor side member tooling hole (O13) |
|
|
|
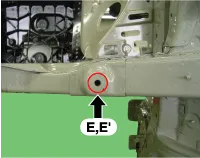
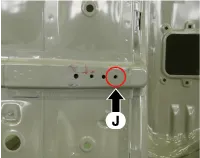
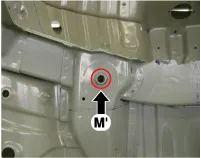
| Center floor side member tooling hole (O8) | Center floor side member tooling hole (O9) | Center floor side member tooling hole (O9) |

|
|
|
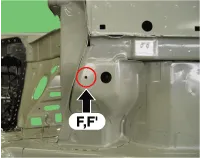
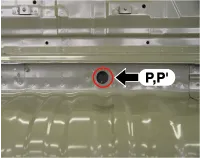
| Side sill inner rear panel tooling hole (O8) | Rear floor side member tooling hole (O16) | Rear sub frame mounting pipe |
|
|
|
| Rear sub frame mounting pipe | Rear suspension spring mounting hole (O20) | Rear sub frame mounting bolt |
| ||
| Rear floor side member tooling hole (O25) |


* These dimensions indicated in this figure are actual-measurement dimensions. [ Unit : mm (inch) ] Side outer panel rear corner Side outer panel rear corner Side outer panel rear corner Rear combination lamp mounting hole(O6.
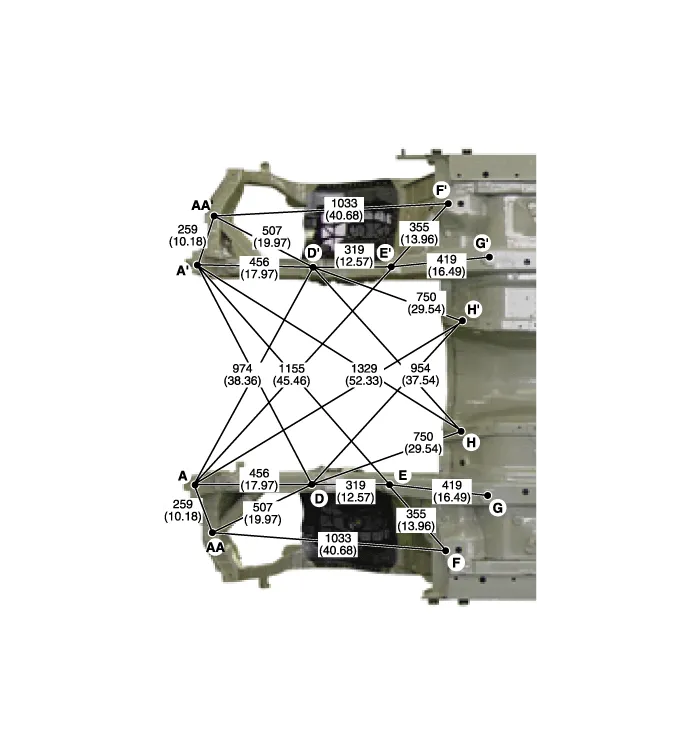
Front Cross Member * These dimensions indicated in this figure are actual-measurement dimensions. [ Unit : mm (inch) ] * These dimensions indicated in this figure are actual-measurement dimensions.
Categories
- Manuals Home
- Hyundai Genesis Owners Manual
- Hyundai Genesis Service Manual
- Restraint
- Front Door
- Engine Mechanical System
- New on site
- Most important about car

Copyright © 2026 www.hgenesisdh.com - 0.0298