Hyundai Genesis (DH): Differential Carrier Assembly / Rear Differential Carrier Repair procedures

Removal
1.
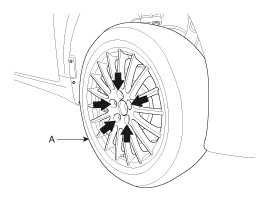
Remove the rear wheel and tire (A) from the rear hub.

Tightening torque:
88.3 ~ 107.9 N.m (9.0 ~ 11.0 kgf.m, 65.1 ~ 79.6 lb-ft)

   
Be careful not to damage the hub bolts when removing the rear wheel and tire (A).

2.
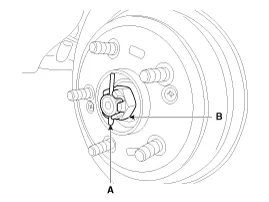
With the brake engaged, remove the split pin (A) from the rear hub and remove the castle nut (B).

Tightening torque :
196.1 ~ 274.5 N.m (20.0 ~ 28.0 kgf.m, 144.7 ~ 202.5 lb-ft)

3.
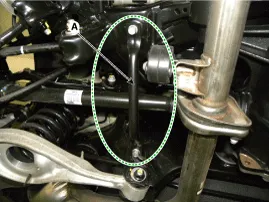
Remove the bracket (A).

Tightening torque :
49.0 ~ 63.7N.m (5.0 ~ 6.5 kgf.m, 36.2 ~ 47.0 lb-ft)

4.
Remove the muffler.
(Refer to Engine Mechanical System - "Muffler")
5.
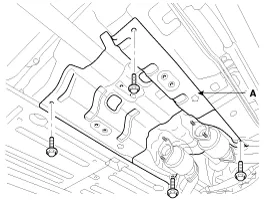
Loosen the mount bolts and then aluminum cover (A).

Tightening torque:
6.9 ~ 13.7 N.m (0.7 ~ 1.4 kgf.m, 5.1 ~ 10.1 lb-ft)

6.
Record the position of the alignment marks (C) on the rubber coupling of the propeller (A) and companion and the corresponding marks on the differential carrier (B), and then remove the propeller shaft tightening bolt (D).

Tightening torque :
88.3 ~ 107.9 N.m (9.0 ~ 11.0 kgf.m, 65.1 ~ 79.6 lb-ft)


    Component 1. Rear differential carrier assembly Component [With Lambda Engine] 1. Pinion lock nut 2. Companion flange 3. Pinion oil seal 4.

    Other information:

    Hyundai Genesis (DH) 2013-2016 Service Manual: Components and Components Location

    C

    Hyundai Genesis (DH) 2013-2016 Service Manual: Auto Defogging Sensor Description and Operation

    Description The auto defogging sensor is installed on the front window glass. The sensor judges and sends signal if moisture occurs to blow out wind for defogging. The air conditioner control module receives signal from the sensor and restrains moisture and eliminate defog by controlling the intake actuator, A/C, auto defogging actuator,

    Categories

     
    Copyright © 2025 www.hgenesisdh.com - 0.0219