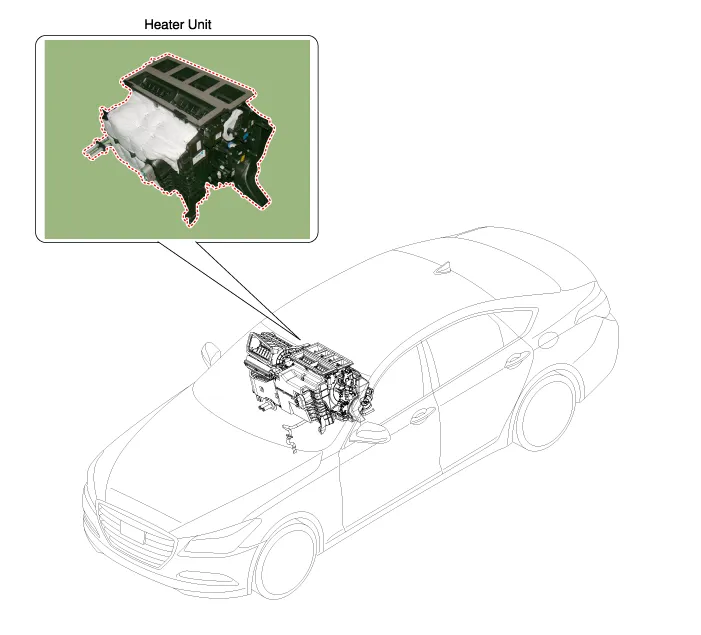
Hyundai Genesis (DH): Heater / Heater Unit Components and Components Location
Hyundai Genesis (DH) 2013-2016 Service Manual / Heating, Ventilation and Air Conditioning / Heater / Heater Unit Components and Components Location
| Component Location |
| Components (1) |
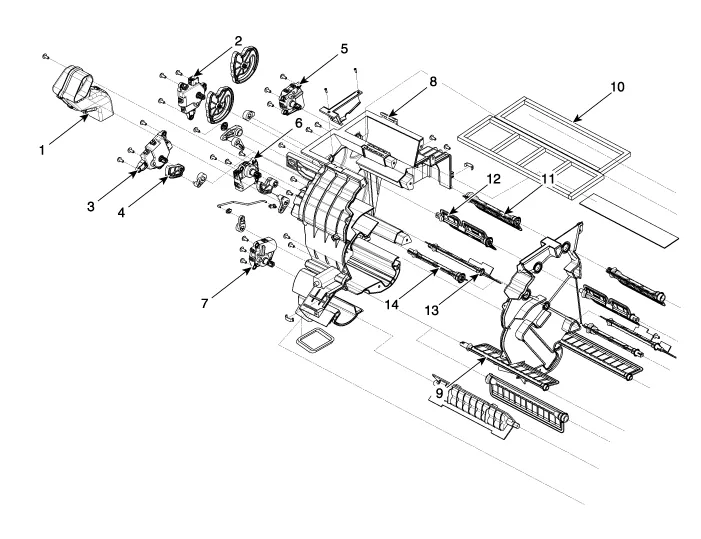
| 1. Shower duct (Left) 2. Mode actuator (LH) 3. Temperature control actuator (LH) 4. Temperature door lever (Left) 5. Mode actuator (A) 6. Console temperature actuator (A) 7. Console mode actuator ON/OFF | 8. Heater case (Left) 9. Console temperature door (A) 10. Duct seal center 11. DEF door assembly (left) 12. Vent door assembly (left) 13. Temperature door assembly (left) 14. Floor door assembly (left) |
| Components (2) |
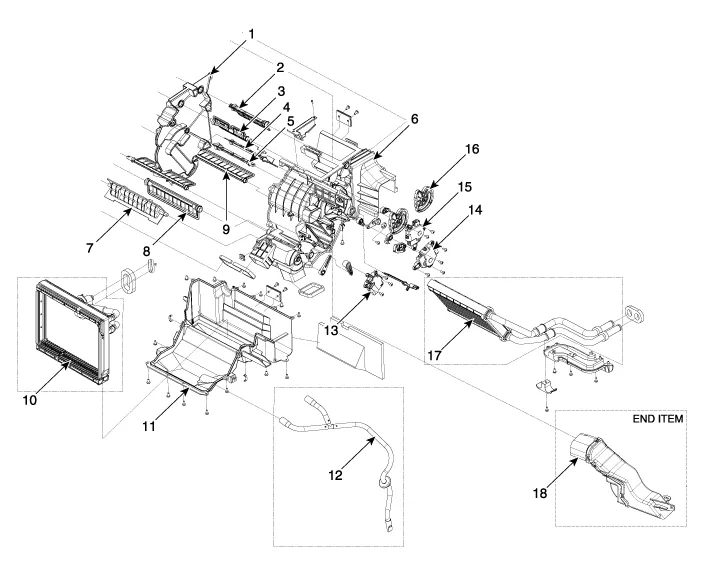
| 1. Separator 2. DEF door assembly (right) 3. Vent door assembly (right) 4. Temperature door assembly (right) 5. Floor door assembly (right) 6. Heater case (right) 7. Console mode door assembly 8. Console door assembly ON / OFF 9. Console temperature door assembly | 10. Emulator core assembly 11. Emulator core lower cover 12. Drain hose assembly 13. Mode actuator 14. Mode actuator (RH) 15. Mode actuator (RH) 16. Mode cam (right) 17. Heater core assembly 18. Shower duct (right) |
Replacement 1. Disconnect the negative (-) battery terminal. 2. Recover the refrigerant with a recovery/recycling/charging station. 3. When the engine cools down, drain the engine coolant from the radiator.
Other information:
Hyundai Genesis (DH) 2013-2016 Service Manual: Components and Components Location
C
Hyundai Genesis (DH) 2013-2016 Service Manual: Compressor Repair procedures
Removal 1. If the compressor is marginally operable, run the engine at idle speed, and let the air conditioning work for a few minutes, then shut the engine off. 2. Disconnect the negative (-) battery terminal. 3. Remove the engine room cover.
Categories
- Manuals Home
- Hyundai Genesis Owners Manual
- Hyundai Genesis Service Manual
- General Information
- Heating, Ventilation and Air Conditioning
- Starter Repair procedures
- New on site
- Most important about car

Copyright © 2026 www.hgenesisdh.com - 0.0312