Other information:
Inspection
1.
Disconnect the negative (-) battery terminal.
2.
Remove the crash pad lower panel.
(Refer to Body - "Crash Pad Lower Panel")
3.
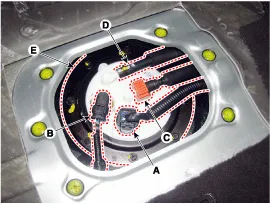
Remove the lower crash pad switch assembly (A) after disengaging the mounting clip.
4.
Remove the rheostat switch connector (A).
Removal
1.
Disconnect the negative (-) battery terminal.
2.
Remove the front/rear bumper cover.
(Refer to Body - "Front Bumper Cover")
(Refer to Body - "Rear Bumper Cover")
3.
Disconnect the connector (B) from the parking assist sensor (A).