Hyundai Genesis: Rear Suspension System / Rear Shock Absorber Repair procedures
Hyundai Genesis (DH) 2013-2016 Service Manual / Suspension System / Rear Suspension System / Rear Shock Absorber Repair procedures
| Removal |
| 1. |
Loosen the wheel nuts slightly. Raise the vehicle, and make sure it is securely supported. |
| 2. |
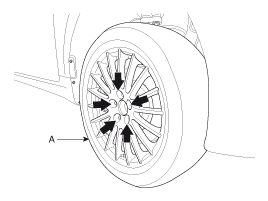
Remove the front wheel and tire (A) from the rear hub.
|
| 3. |
Support the lower portion of the rear axle with a jack securely. |
| 4. |
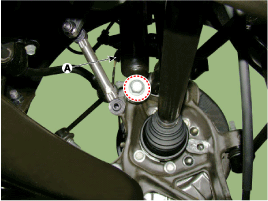
Loosen the bolt & nut and then separate the rear shock absorber.
|
| 5. |
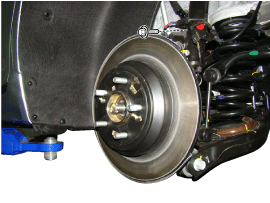
Disconnect solenoid ESC & wheel speed sensor connector
and then remove the wheel speed sensor bracket by loosening the bolt.
|
| 6. |
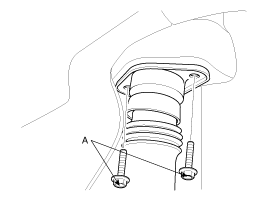
Loosen the bracket bolt (A) to disconnect the rear shock absorber from the wheel housing panel.
|
| 7. |
Installation is in the reverse order of removal. |
| 8. |
Check the alignment.
(Refer to Tires/Wheels - "Alignment")
|
| Inspection |
| 1. |
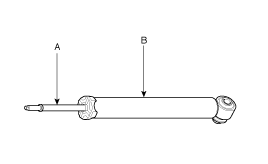
Repeatedly pump the piston rod (A) to check it for abnormal resistance or noises. |
| 2. |
If the piston rod does not move smoothly or creates abnormal noise when moving, replace the shock absorber assembly. |
| 3. |
To dispose of a shock absorber, fully extend the piston rod and drill a hole in the rear section (B) to release the gas.
|
 Rear Shock Absorber Components and Components Location
Components
1. Insulator cap2. Lock nuts3. Insulator assembly4. Dust cover5. Bumper stopper6. Shock absorber
...
 Rear Upper Arm Repair procedures
Removal
1.
Loosen the wheel nuts slightly. Raise the vehicle, and make sure it is securely supported.
2.
Remove the front wheel and tire (A) from the rear hub.
Tightening torque:
88.3 ~ 10 ...
Other information:
Hyundai Genesis (DH) 2013-2016 Service Manual: Front Wheel Guard Repair procedures
Replacement • Put on gloves to prevent hand injuries. • When removing with a flat-tip screwdriver or remover, wrap protective tape around the tools to prevent damage to components. • Take care not to scratch the body surface. ...
Hyundai Genesis (DH) 2013-2016 Service Manual: Room Lamp Repair procedures
Removal 1. Disconnect the negative (-) battery terminal. 2. Separate the room lamp (B) from the roof trim after disengaging the mounting clip (A). 3. Separate the makeup lamp (B) from the roof trim after disengaging the mounting clip (A). Installation 1. Install the lamp assembly af ...
© 2013-2025 www.hgenesisdh.com

