Hyundai Genesis: Rear Bumper / Rear Bumper Cover Repair procedures
Hyundai Genesis (DH) 2013-2016 Service Manual / Body (Interior and Exterior) / Rear Bumper / Rear Bumper Cover Repair procedures
| Replacement |
|
|
| • |
When removing with a flat-tip screwdriver or remover, wrap protective tape around the tools to prevent damage to components. |
| • |
When removing the interior trim pieces, use a plastic panel removal tool not to damage the surface. |
| • |
Take care not to bend or scratch the trim and panels. |
| 1. |
Remove the rear transverse trim.
(Refer to "Trunk Trim") |
| 2. |
Remove the luggage covering complete.
(Refer to "Trunk Trim") |
| 3. |
Remove the luggage under cover.
(Refer to "Trunk Trim") |
| 4. |
Remove the luggage side trim.
(Refer to "Trunk Trim") |
| 5. |
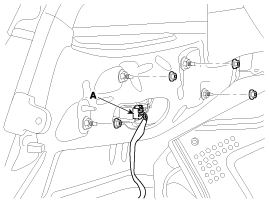
After loosening the real combination lamp mounting nuts, disconnect the connector (A).
|
| 6. |
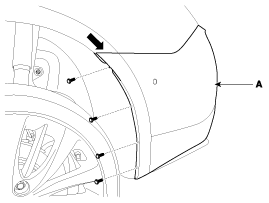
After loosening the pin-type retainers and screws on the side of rear bumper (A), detach the side part of rear bumper.
|
| 7. |
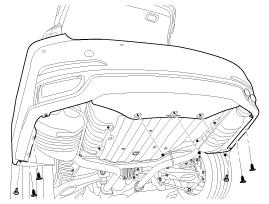
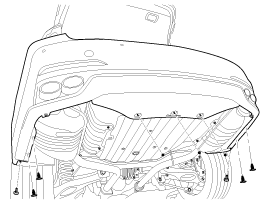
Loosen the rear bumper lower mounting pin-type retainers and nuts.
[Lambda engine]
[Tau engine]
|
| 8. |
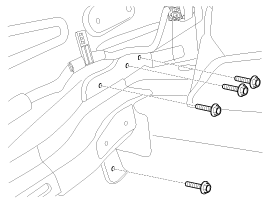
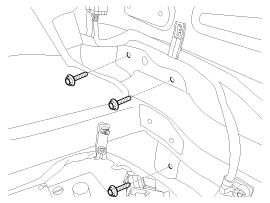
Loosen the rear bumper mounting bolts inside of the trunk.
[LH]
[RH]
|
| 9. |
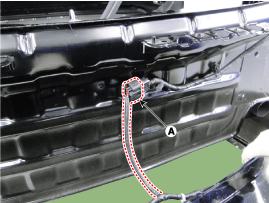
Disconnect the rear bumper main connector (A).
|
| 10. |
Install in the reverse order of removal.
|
 Rear Bumper Cover Components and Components Location
Component Location
[Lambda engine]
1. Rear bumper cover
[Tau engine]
1. Rear bumper cover
...
 Rear Bumper Beam Assembly Components and Components Location
Component Location
1. Rear bumper beam assembly
...
Other information:
Hyundai Genesis (DH) 2013-2016 Owners Manual: Autonomous Emergency Braking (AEB)
The Autonomous Emergency Braking (AEB) helps avoid accidents by identifying critical situations early and warning the driver. WARNING Take the following precautions when using the Autonomous Emergency Braking (AEB): This system is only a supplemental system and it is not intend ...
Hyundai Genesis (DH) 2013-2016 Service Manual: Occupant Classification System(OCS) Description and Operation
Description In order to make normal activation of airbag system, SRSCM detects DTC(s) for the Occupant Classification System (OCS). If the seat is occupied, OCS detects passenger presences status and send signal to SRSCM via CAN. SRSCM recognizes the signal as 2(two) different classifica ...
© 2013-2025 www.hgenesisdh.com


