Hyundai Genesis (DH): Front Propeller Shaft Assembly / Propeller Shaft Repair procedures
Hyundai Genesis (DH) 2013-2016 Service Manual / Driveshaft and axle / Front Propeller Shaft Assembly / Propeller Shaft Repair procedures
| Inspection |
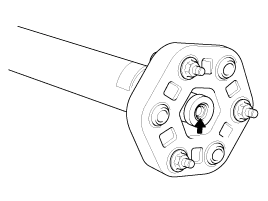
Inspect Flexible Coupling
| 1. |
Check the front and rear flexible couplings for cracks or damage. |
| 2. |
Inspect the flexible coupling centering bushing.If the busing is damaged, replace the propeller shaft assembly.
|
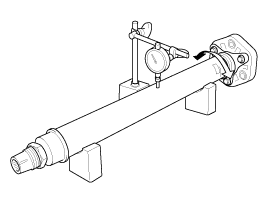
Propeller Shaft Runout
| 1. |
Install a dial indicator with its needle on the center of front propeller shaft or rear propeller shaft. |
| 2. |
Turn the propeller shaft slowly and check the runout. Repeat this procedure for the other propeller shaft.
|
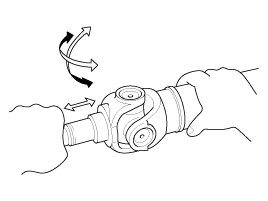
Universal Joint Inspect
| 1. |
Check that the spider bearing rotates smoothly. |
| 2. |
Check that there is no play in the spider bearing and replace the propeller shaft if necessary.
|
| Removal |
| 1. |
Loosen the wheel nuts slightly. Raise the vehicle, and make sure it is securely supported. |
| 2. |
Remove the muffler.
(Refer to Engine Mechanical System - "Muffler") |
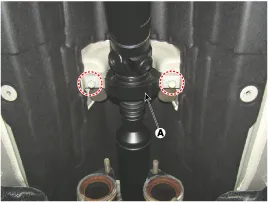
| 3. |
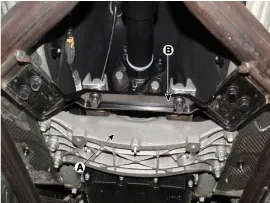
Loosen the mount bolts and then aluminum cover (A).
|
| 4. |
Remove the center bearing bracket (A) mounting bolts.
|
| 5. |
Remove the cross member (A), stay mounting bracket (B). [2WD]
|

| 6. |
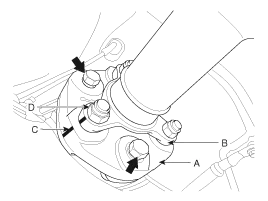
After making a match mark (C) on the rubber coupling (A) and
rear differential companion (B), remove the propeller shaft mounting
bolts (D).[4WD]
|

| 7. |
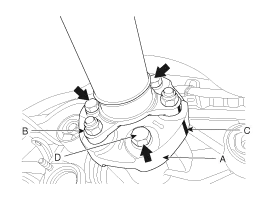
Make the alignment marks (C) on the rubber coupling of the
propeller (A) and companion, and the corresponding marks on the
differential carrier (B), and then remove the propeller shaft tightening
bolt (D).
|
| 8. |
Install in the reverse order of removal. |
Components Location 1. Propeller shaft2. Center bearing bracket
Other information:
Hyundai Genesis (DH) 2013-2016 Service Manual: Auto Head Lamp Leveling Unit Repair procedures
Inspection 1. Ignition "ON". 2. Turn on the head lamp switch. 3. Check that the aim of the head lamp changes smoothly when the head lamp leveling device switch is turned on. 4. If it does not operate well, check the connector and terminals to make sure that they are connected.
Hyundai Genesis (DH) 2013-2016 Service Manual: Photo Sensor Description and Operation
Description The photo sensor is located in the right side of the inside rearview mirror. he integrated rain sensor is located in the right side of the inside rearview mirror. The integrated rain sensor is a multifunctional sensor which combines the photo sensor and auto light sensor, and has a built-in photovoltaic diode (for detecting t
Categories
- Manuals Home
- Hyundai Genesis Owners Manual
- Hyundai Genesis Service Manual
- Electric Parking Brake (EPB) Repair procedures
- Suspension System
- Description and Operation
- New on site
- Most important about car

Copyright © 2026 www.hgenesisdh.com - 0.0209