Hyundai Genesis (DH): Engine Control System / Canister Close Valve (CCV) Repair procedures
Hyundai Genesis (DH) 2013-2016 Service Manual / Engine Control / Fuel System / Engine Control System / Canister Close Valve (CCV) Repair procedures
| Inspection |
| 1. |
Turn the ignition switch OFF. |
| 2. |
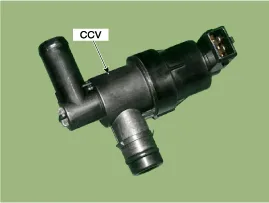
Disconnect the CCV connector. |
| 3. |
Measure resistance between the CCV terminal 1 and 2. |
| 4. |
Check that the resistance is within the specification.
|
| 5. |
Disconnect the vapor hose connected with the canister from the CCV. |
| 6. |
Connect a vacuum pump to the nipple. |
| 7. |
Ground the CCV control line and apply battery voltage to the CCV power supply line. |
| 8. |
Apply vacuum and check the valve operation.
|
| Removal |
| 1. |
Turn the ignition switch OFF and disconnect the negative (-) battery cable. |
| 2. |
Remove the Fuel tank air filter.
(Refer to Emission Control System - "Fuel Tank Air Filter") |
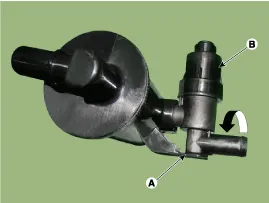
| 3. |
Release the fixing hooks (A), and then separate the canister
close valve (B) from the fuel tank air filter (C) after rotating it in
the direction of the arrow in the figure.
|
| Installation |
Schematic Diagrams Other information:Hyundai Genesis (DH) 2013-2016 Service Manual: License Lamps Repair proceduresRemoval 1. Disconnect the negative (-) battery terminal. 2. Remove the trunk lid panel. (Refer to Body - "Trunk Lid Back Panel") 3. Remove the license lamp after disengaging the license lamp mounting clip (A) 4. Remove the license lamp assembly after disconnecting the license connector (A). Hyundai Genesis (DH) 2013-2016 Service Manual: Description and OperationDescription BSD is a system that measures the speed of and distance from the following vehicles by using two magnetic wave radar sensors attached to the rear bumper, and detects any vehicle within the blind spot zone and gives off alarm (visual and auditory). Categories

Copyright © 2026 www.hgenesisdh.com - 0.0284
|
