Hyundai Genesis (DH): Timing System / Drive Belt Repair procedures
Hyundai Genesis (DH) 2013-2016 Service Manual / Engine Mechanical System / Timing System / Drive Belt Repair procedures
| Removal and Installation |
| 1. |
Disconnect the battery "-" terminal from the trunk room. |
| 2. |
Remove the engine cover.
(Refer to Engine And Transaxle Assembly - "Engine Cover") |
| 3. |
Remove the engine room cover.
(Refer to Engine And Transaxle Assembly - "Engine Cover") |
| 4. |
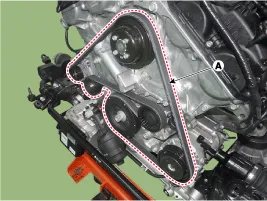
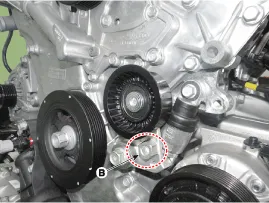
Turn the tensioner (B) clockwise and loosen it, then remove the drive belt (A).
|
| 5. |
To install, reverse the removal procedure. |
| Inspection |
Inspect Drive Belt
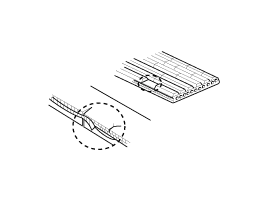
Visually check the belt for excessive wear, frayed cords etc.
If any defect has been found, replace the drive belt.
Cracks on the rib side of a belt are considered acceptable.
If the belt has chunks missing from the ribs, it should be
replaced. |

Drive belt, Idler, Belt tensioner pulley
| 1. |
Check the idler for excessive oil leakage, abnormal rotation or vibration. Replace the idler if necessary. |
| 2. |
Check the belt tensioner for excessive dust, crack, and damage and inspect it Replace if necessary. |
| 3. |
Check the belt replacement cycle, and inspect the belt for the abnormal wear of v-ripped part and uneven wear if necessary. |
| 4. |
Check the crankshaft pulley, auxiliary pulley for vibration
when rotating, and V-ribbed part for foreign materials or uneven
contact. Replace the components if necessary. |
Components 1. Drive belt2. Drive belt tensioner3. Crankshaft pulley4. Water pump pulley5. Idler6. Cylinder head cover7. Exhaust camshaft OCV cap 1.
Components 1. Idler
Other information:
Hyundai Genesis (DH) 2013-2016 Service Manual: Repair procedures
R
Hyundai Genesis (DH) 2013-2016 Service Manual: Heater Unit Components and Components Location
Component Location Components (1) 1. Shower duct (Left)2. Mode actuator (LH)3. Temperature control actuator (LH)4. Temperature door lever (Left)5. Mode actuator (A)6. Console temperature actuator (A)7. Console mode actuator ON/OFF8. Heater case (Left)9.
Categories
- Manuals Home
- Hyundai Genesis Owners Manual
- Hyundai Genesis Service Manual
- Rain Sensor Repair procedures
- Smart Cruise Control Unit Repair procedures
- Electric Parking Brake (EPB) Repair procedures
- New on site
- Most important about car
Copyright В© 2026 www.hgenesisdh.com - 0.0226


