Hyundai Genesis (DH): Air Conditioning System / Compressor Repair procedures
| Removal |
| 1. |
If the compressor is marginally operable, run the engine at
idle speed, and let the air conditioning work for a few minutes, then
shut the engine off. |
| 2. |
Disconnect the negative (-) battery terminal. |
| 3. |
Remove the engine room cover.
(Refer to Engine Mechanical System - "Engine room cover") |
| 4. |
Remove the air cleaner assembly.
(Refer to Engine Mechanical System - "Air cleaner") |
| 5. |
Recover the refrigerant with a recovery/charging station. |
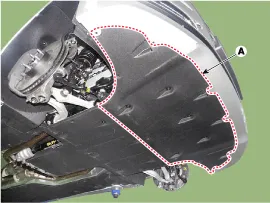
| 6. |
Remove the engine room under cover (A).
|
| 7. |
Loosen the drive belt.
(Refer to Engine Mechanical System - "Timing System") |
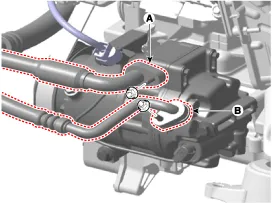
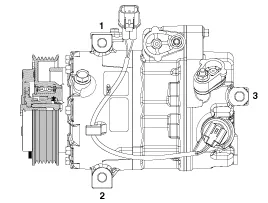
| 8. |
Remove the bolts, then disconnect the suction line (A) and discharge line (B) from the compressor.
|

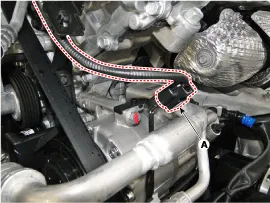
| 9. |
Disconnect the compressor switch connector (A).
|
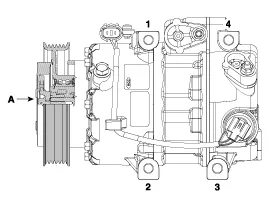
| 10. |
Remove the compressor (A) by loosening the mounting bolts.
[Lambda Engine]
[Tau Engine]
|
| Installation |
| 1. |
Make sure the compressor mounting bolt with the correct
length is screwed in. Tighten the mounting bolts in the specified
tightening order.
[Lambda Engine]
[Tau Engine]
|
| 2. |
Install in the reverse order of removal.
|
