Hyundai Genesis: Why Didn’t My Air Bag Go Off in a Collision? (Air bags are not designed to inflate in every collision.) / Air bag inflation conditions
Front air bag
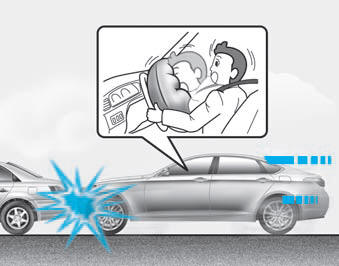
Front air bags are designed to inflate in a frontal collision depending on the intensity, speed, or angles of impact of the front collision.
Side impact and curtain air bags
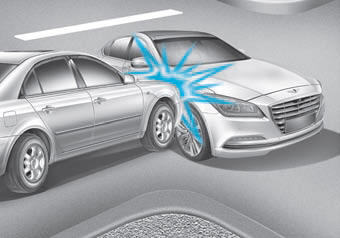
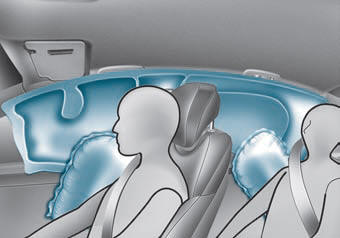
Side impact and curtain air bags are designed to inflate when an impact is detected by side collision sensors depending on the strength, speed, or angles of impact resulting from a side impact collision.
Although the driver’s and front passenger’s air bags are designed to inflate only in frontal collisions, they also may inflate in other types of collisions if the front impact sensors detect a sufficient impact. Side impact and curtain air bags are designed to inflate only in side impact collisions or rollover situations, but they may inflate in other collisions if the side impact sensors detect a sufficient impact.
If the vehicle chassis is impacted by bumps or objects on unimproved roads, the air bags may deploy. Drive carefully on unimproved roads or on surfaces not designed for vehicle traffic to prevent unintended air bag deployment.
 Air bag collision sensors
WARNING
To reduce the risk of an air bag
deploying unexpectedly and
causing serious injury or death:
Do not hit or allow any objects
to impact the locations where
air bags or sensors ar ...
 Air bag non-inflation conditions
In certain low-speed collisions the air
bags may not deploy. The air bags
are designed not to deploy in such
cases because they may not provide
benefits beyond the protection of the
seat b ...
Other information:
Hyundai Genesis (DH) 2013-2016 Service Manual: Power Trunk Open/Close Switch Repair procedures
Inspection 1. Remove the crash pad lower panel. (Refer to Body - "Crash Pad Lower Panel") 2. Check for continuity between terminals (A) of the power trunk switch. Removal 1. Disconnect the negative (-) battery terminal. 2. Remove the crash pad lower panel. (Refer to Body - "Crash ...
Hyundai Genesis (DH) 2013-2016 Service Manual: Rear Door Latch Components and Components Location
Component Location 1. Rear door latch ...
