Hyundai Genesis: Front Seat / Front Seat Assembly Repair procedures
Hyundai Genesis (DH) 2013-2016 Service Manual / Body (Interior and Exterior) / Front Seat / Front Seat Assembly Repair procedures
| Replacement |
|

| 1. |
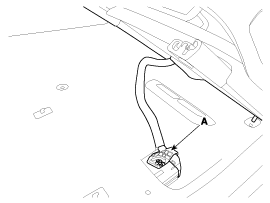
Remove the front anchor seat belt (A).
|
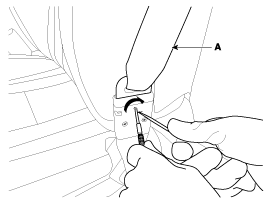

 ) and turn it clockwise.
 ).
).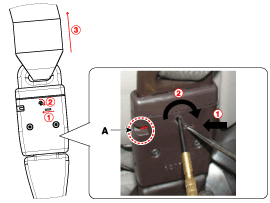
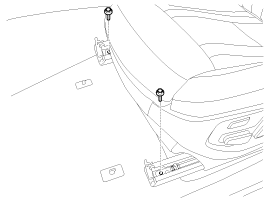
| 2. |
After opening the seat track cover and loosening the mounting bolts, remove the front seat assembly.
[Front]
[Rear]
|

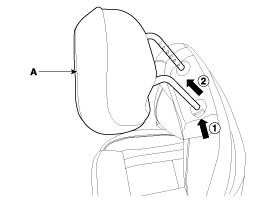
| 3. |
Pull up the front seat headrest (A).
|
| 4. |
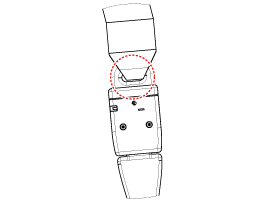
Disconnect the front seat integration connector (A).
|
| 5. |
Install in the reverse order of removal.
|

 Front Seat Assembly Components and Components Location
Component Location
1. Front seat assembly
...
 Front Seat Shield Outer Cover Components and Components Location
Component Location
1. Front seat front shield outer cover2. Rear seat shield outer cover
...
Other information:
Hyundai Genesis (DH) 2013-2016 Owners Manual: Immobilizer System
The immobilizer system protects your vehicle from theft. If an improperly coded key (or other device) is used, the engine’s fuel system is disabled. When the Engine Start/Stop button is in the ON position, the immobilizer system indicator should come on briefly, then go off. If the in ...
Hyundai Genesis (DH) 2013-2016 Service Manual: Intake Actuator Repair procedures
Inspection 1. Turn the ignition switch OFF. 2. Disconnect the intake actuator connector. 3. Verify that the intake actuator operates to the fresh position when connecting 12V to terminal 3 and grounding terminal 4. Verify that the intake actuator operates to the recirculation position w ...
© 2013-2025 www.hgenesisdh.com
