Hyundai Genesis: Floor Console / Floor Console Assembly Repair procedures
Hyundai Genesis (DH) 2013-2016 Service Manual / Body (Interior and Exterior) / Floor Console / Floor Console Assembly Repair procedures
| Replacement |
|
|
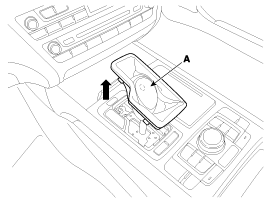
| 1. |
Remove the gear knob and boots (A) by pulling them vertically.
|
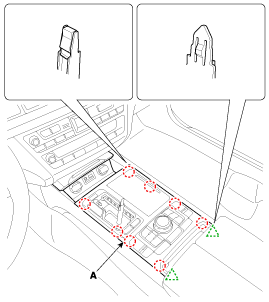
| 2. |
Using a screwdriver or remover, remove the front console upper cover (A).
|
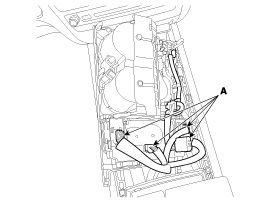
| 3. |
Disconnect the connectors (A).
|
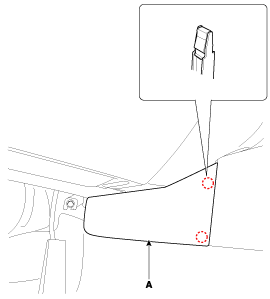
| 4. |
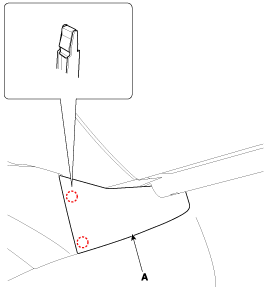
Using a screwdriver or remover, remove the console side cover (A).
[LH]
[RH]
|
| 5. |
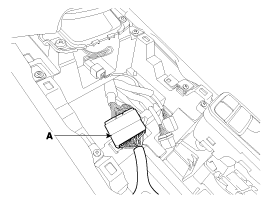
Disconnect the floor console main connector (A).
|
| 6. |
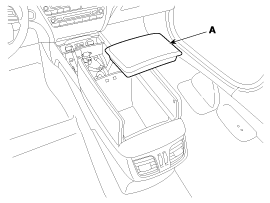
Remove the console armrest tray (A).
|
| 7. |
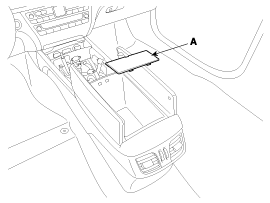
Remove the console armrest service cover (A).
|
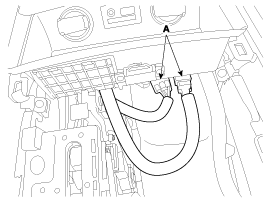
| 8. |
Disconnect the multimedia jcak connectors (A).
|
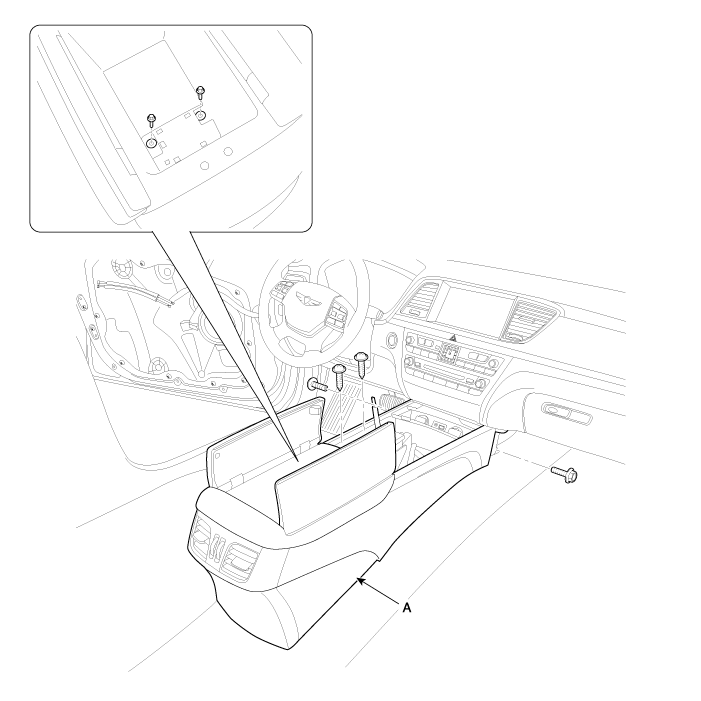
| 9. |
After loosening the mounting screws and bolts, remove the floor console assembly (A).
|
| 10. |
Install in the reverse order of removal.
|
 Floor Console Assembly Components and Components Location
Component Location
1. Floor console assembly
...
 Console Armrest Components and Components Location
Component Location
1. Front console armrest
...
Other information:
Hyundai Genesis (DH) 2013-2016 Service Manual: Rear Shock Absorber Components and Components Location
Components 1. Insulator cap2. Lock nuts3. Insulator assembly4. Dust cover5. Bumper stopper6. Shock absorber ...
Hyundai Genesis (DH) 2013-2016 Service Manual: Front Wiper Motor Repair procedures
Removal 1. Disconnect the negative (-) battery terminal. 2. Remove the windshield wiper arm (A) and blade after removing a nut. 3. If necessary of removing the wiper blade, push both sides of wiper tabs (A) and then remove the wiper blade. 4. Remove the cowl top cover. (Refer to Bod ...
© 2013-2025 www.hgenesisdh.com


