Hyundai Genesis (DH): Premium AVN System / AVN(Audio Video Navigation) head unit Components and Components Location
Hyundai Genesis (DH) 2013-2016 Service Manual / Body Electrical System / Premium AVN System / AVN(Audio Video Navigation) head unit Components and Components Location
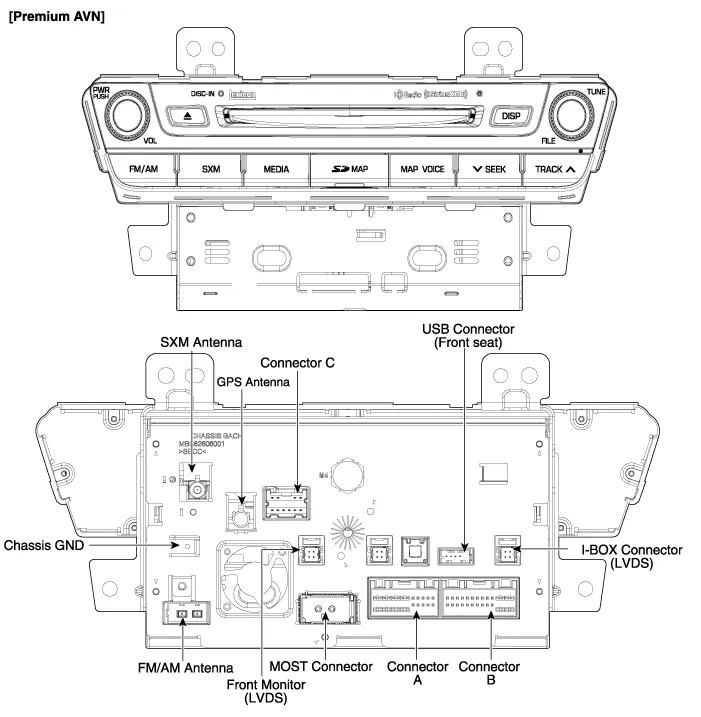
| Components |
Connector Pin Information
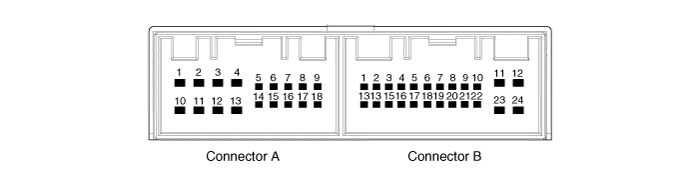
| No. | Connector A | Connector B |
| 1 | - | MM CAN HIGH |
| 2 | Rear seat LCD monitor ON / OFF | - |
| 3 | - | High-speed CAN (+) |
| 4 | - | - |
| 5 | - | AUX video shield GND |
| 6 | - | IGN 1 B(+) |
| 7 | i-BOX microphone (+) | AUX Video |
| 8 | Illumination (+) | AUX R |
| 9 | Reverse | - |
| 10 | i-BOX microphone shield GND | MIC(+) |
| 11 | - | ACC |
| 12 | - | B(+) |
| 13 | - | MM CAN low |
| 14 | Front seat LCD monitor ON / OFF | - |
| 15 | - | High-speed CAN (-) |
| 16 | i-BOX microphone (-) | Vehicle speed |
| 17 | Illumination (-) | Mic shield GND |
| 18 | Antenna B(+) | AUX audio shield GND |
| 19 | ? | AUX video GND |
| 20 | AUX DETECT | |
| 21 | AUX L | |
| 22 | MIC(-) | |
| 23 | M GND | |
| 24 | M GND |


Description Premium AVN system The premium AVN system has improved information search and easiness of manipulation for the driver by simplifying the system operation experience and unifying the display of the user information such as multimedia, air-conditioning and car information.
Removal - Take care not to scratch the crash pad and related parts. - Eject all discs before removing the AVN head unit not to damage the DVD player
Other information:
Hyundai Genesis (DH) 2013-2016 Service Manual: Specifications
S
Hyundai Genesis (DH) 2013-2016 Service Manual: Climate Control Air Filter Repair procedures
Replacement 1. Remove both stoppers (B) by turning them from the glove box (A). 2. Disconnect the air damper (A) from the glove box (B). 3. Remove the filter cover (A) by pressing the knob. 4. Replace the air filter (A) with a new one according to the direction of air filter.
Categories
- Manuals Home
- Hyundai Genesis Owners Manual
- Hyundai Genesis Service Manual
- Description and Operation
- Active Air Flap(AAF) Repair procedures
- Description and Operation
- New on site
- Most important about car

Copyright © 2026 www.hgenesisdh.com - 0.0265